I bet that every one of us has been in a situation in which we have lost important data from our computer. Be it a result of human error, malware attack, or system/software failure we have all been there. There are plenty of tools on the internet that claims to fully recover your data. But not every one of them tend to keep up their promise, and some are too complex for normal people to use. In this post, we’ll be taking a look at the Do You Data Recovery Tool—a fast and easy tool that you can use to recover your lost data.
What is Do Your Data Recovery Tool?
Do Your Data is a premium data recovery tool that is available for both Windows and Mac users. It can recover a wide range of files such as photos, videos, emails, archives, audio, folders, and documents. The tool can come in handy in case of data loss due to accidental deletion, formatting, partition loss, software crash, power failure, and even virus infection.
File Types Supported:
| File Type | Supported Formats |
| Document | DOC/DOCX, XLS/XLSX, PPT/PPTX, PDF, CWK, HTML/HTM, INDD, EPS, etc. |
| Image | JPG/JPEG, TIFF/TIF, PNG, BMP, GIF, PSD, CRW, CR2, NEF, ORF, RAF, SR2, MRW, DCR, WMF, DNG, ERF, RAW, SWF, SVG, etc. |
| Video | AVI, MOV, MP4, M4V, 3GP, 3G2, WMV, MKV, ASF, FLV, SWF, MPG, RM/RMVB, MPEG, etc. |
| Audio | AIF/AIFF, M4A, MP3, WAV, WMA, APE, MID/MIDI, OGG, AAC, RealAudio, VQF etc. |
| PST, DBX, EMLX, EML, MSG etc. | |
| Other | Such as Archives(ZIP, RAR, SIT, ISO etc.), EXE, html etc. |
System Requirement:
| Windows | Mac | |
| OS version |
|
|
| File System | FAT 12/16/32, exFAT, NTFS, NTFS 5, ext 2/3/4, ReFS | FAT 12/16/32, exFAT, HFS+, HFS +, NTFS/NTFS +, ext 2/3/4, APFS |
| Disk Space | at least 60 MB | at least 60 MB |
How to use Do Your Data Recovery Tool?
First, head over to the official site (Windows, Mac) and download the appropriate version of the tool depending upon your computer’s OS platform. Or, you can use the link given below:
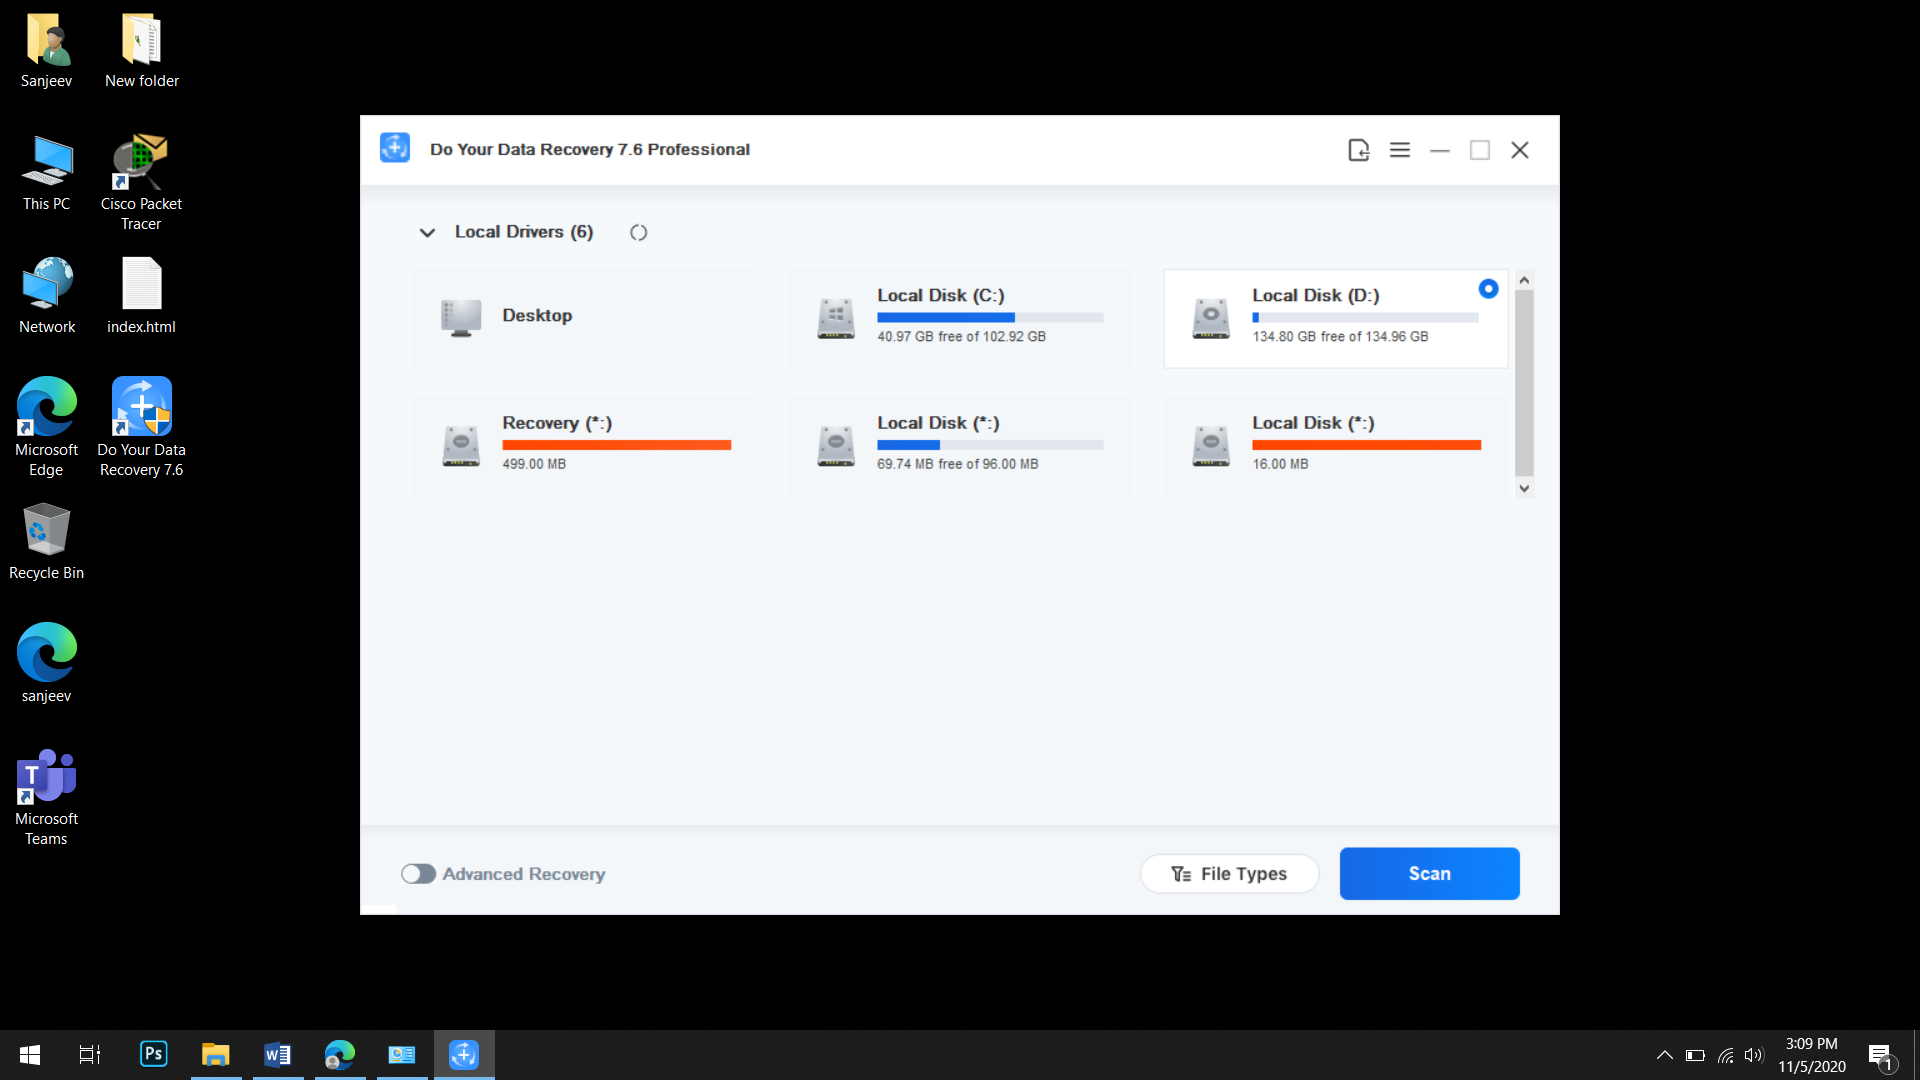
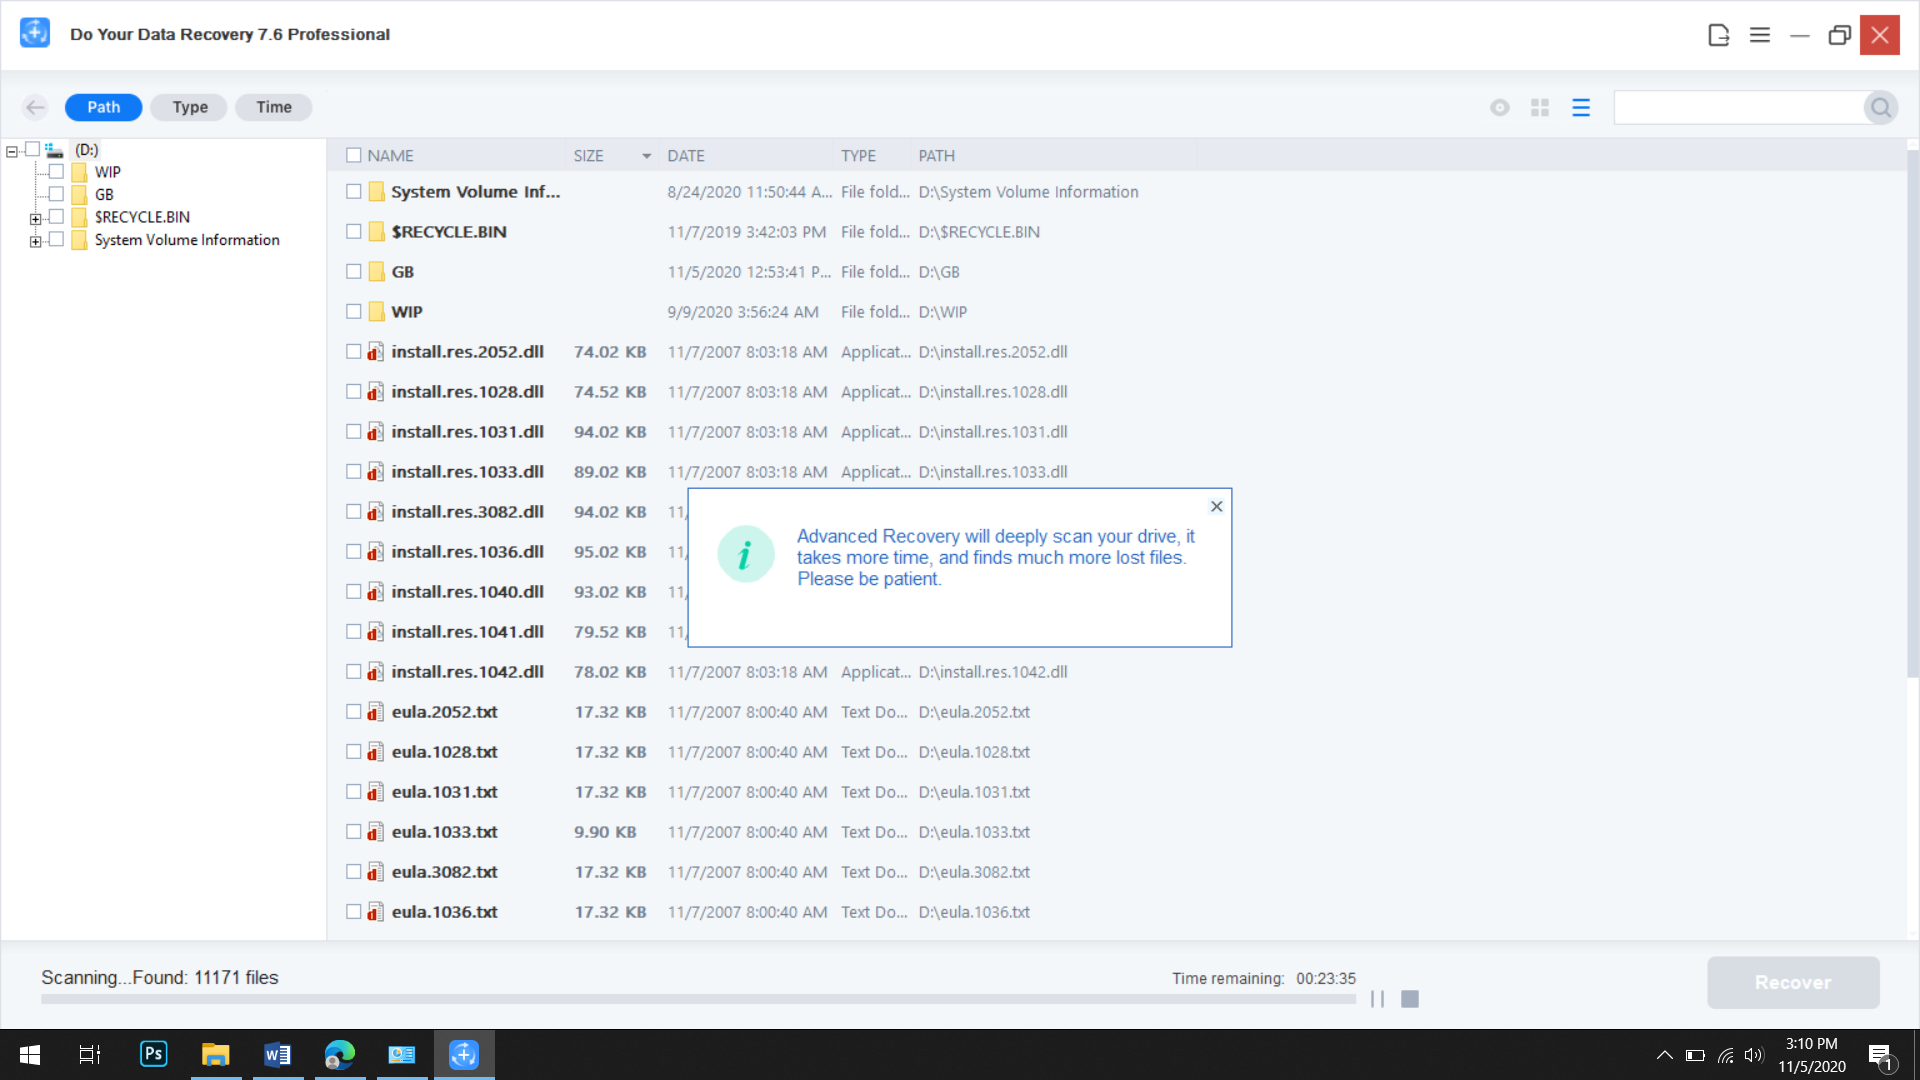
Complete the installation process and launch the software. You will be prompted to select the hard drive that housed your lost data. After selecting the drive, hitting scan will complete a quick scan of the device. For better results, you will have to select the advanced scan option. The scan will take some time to conclude but it will give better results. However, users are allowed to pause and even stop the scan process as per their convenience.
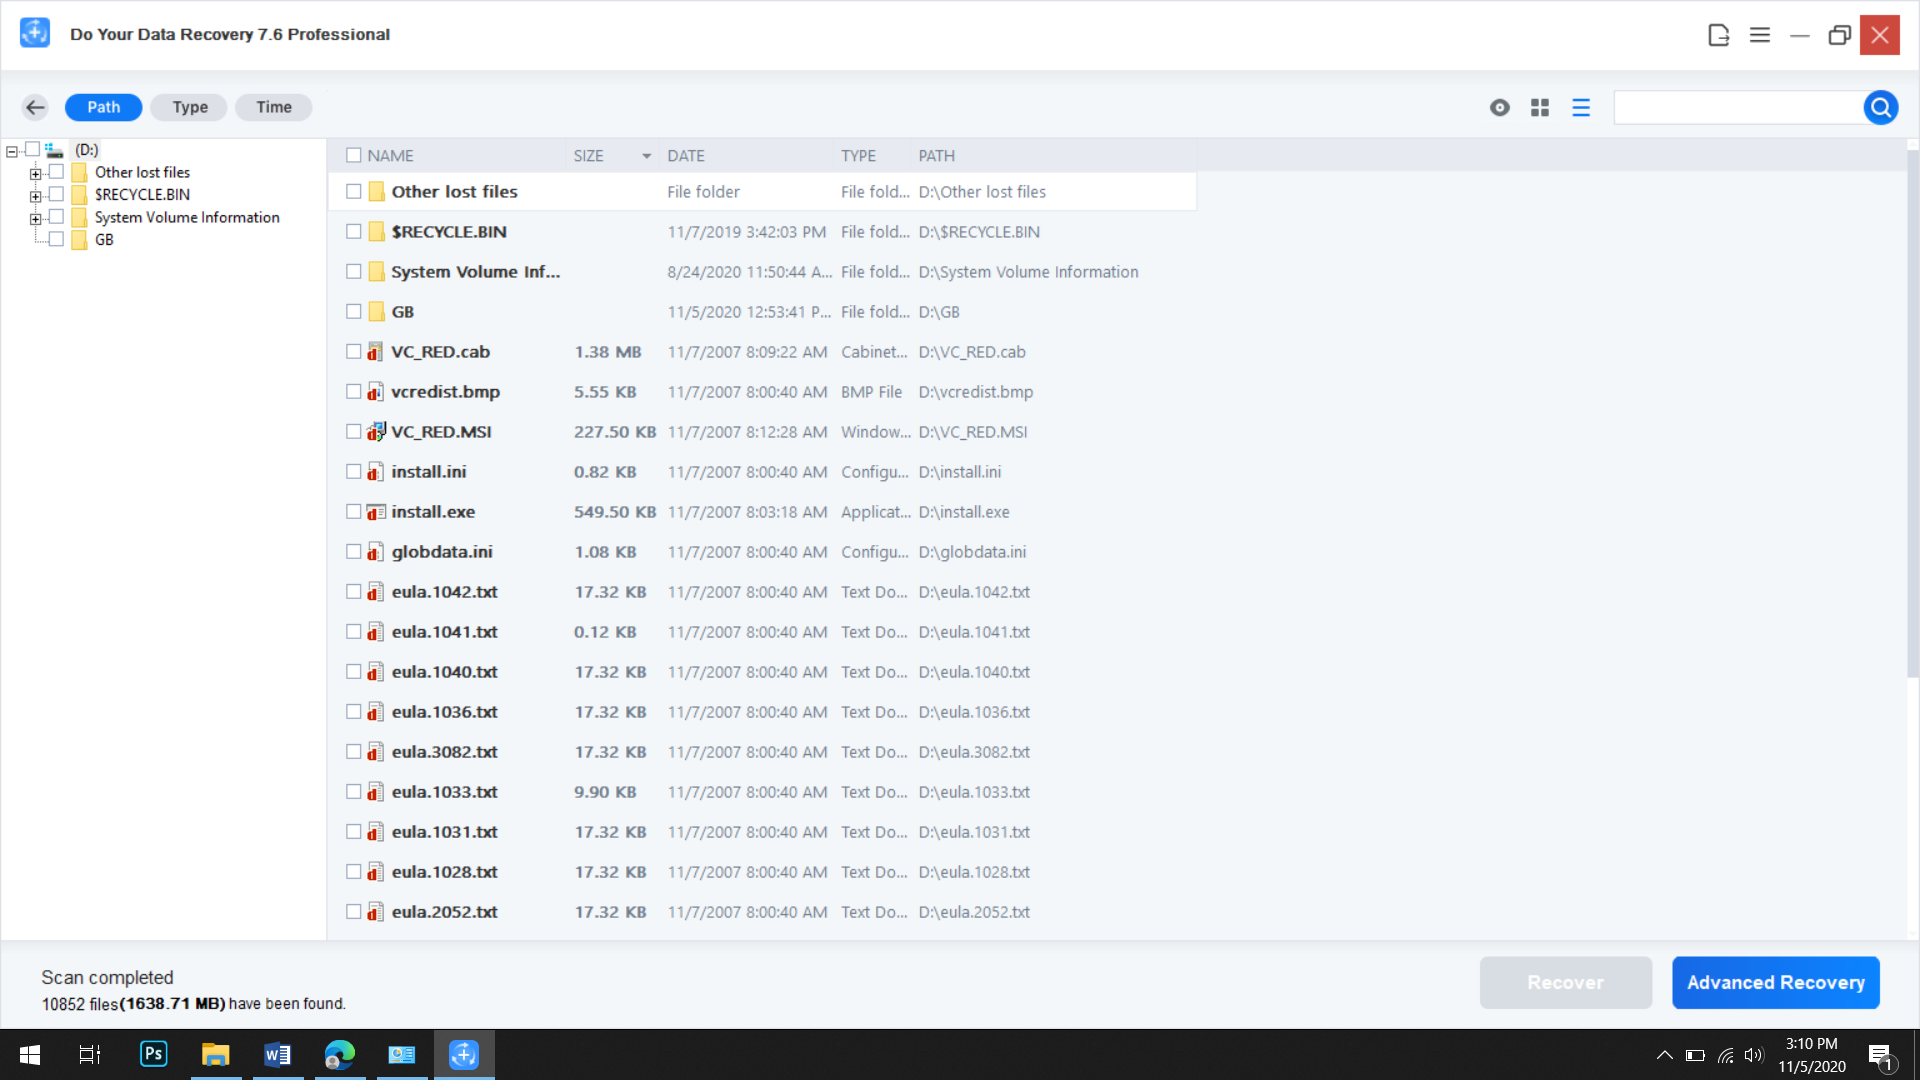
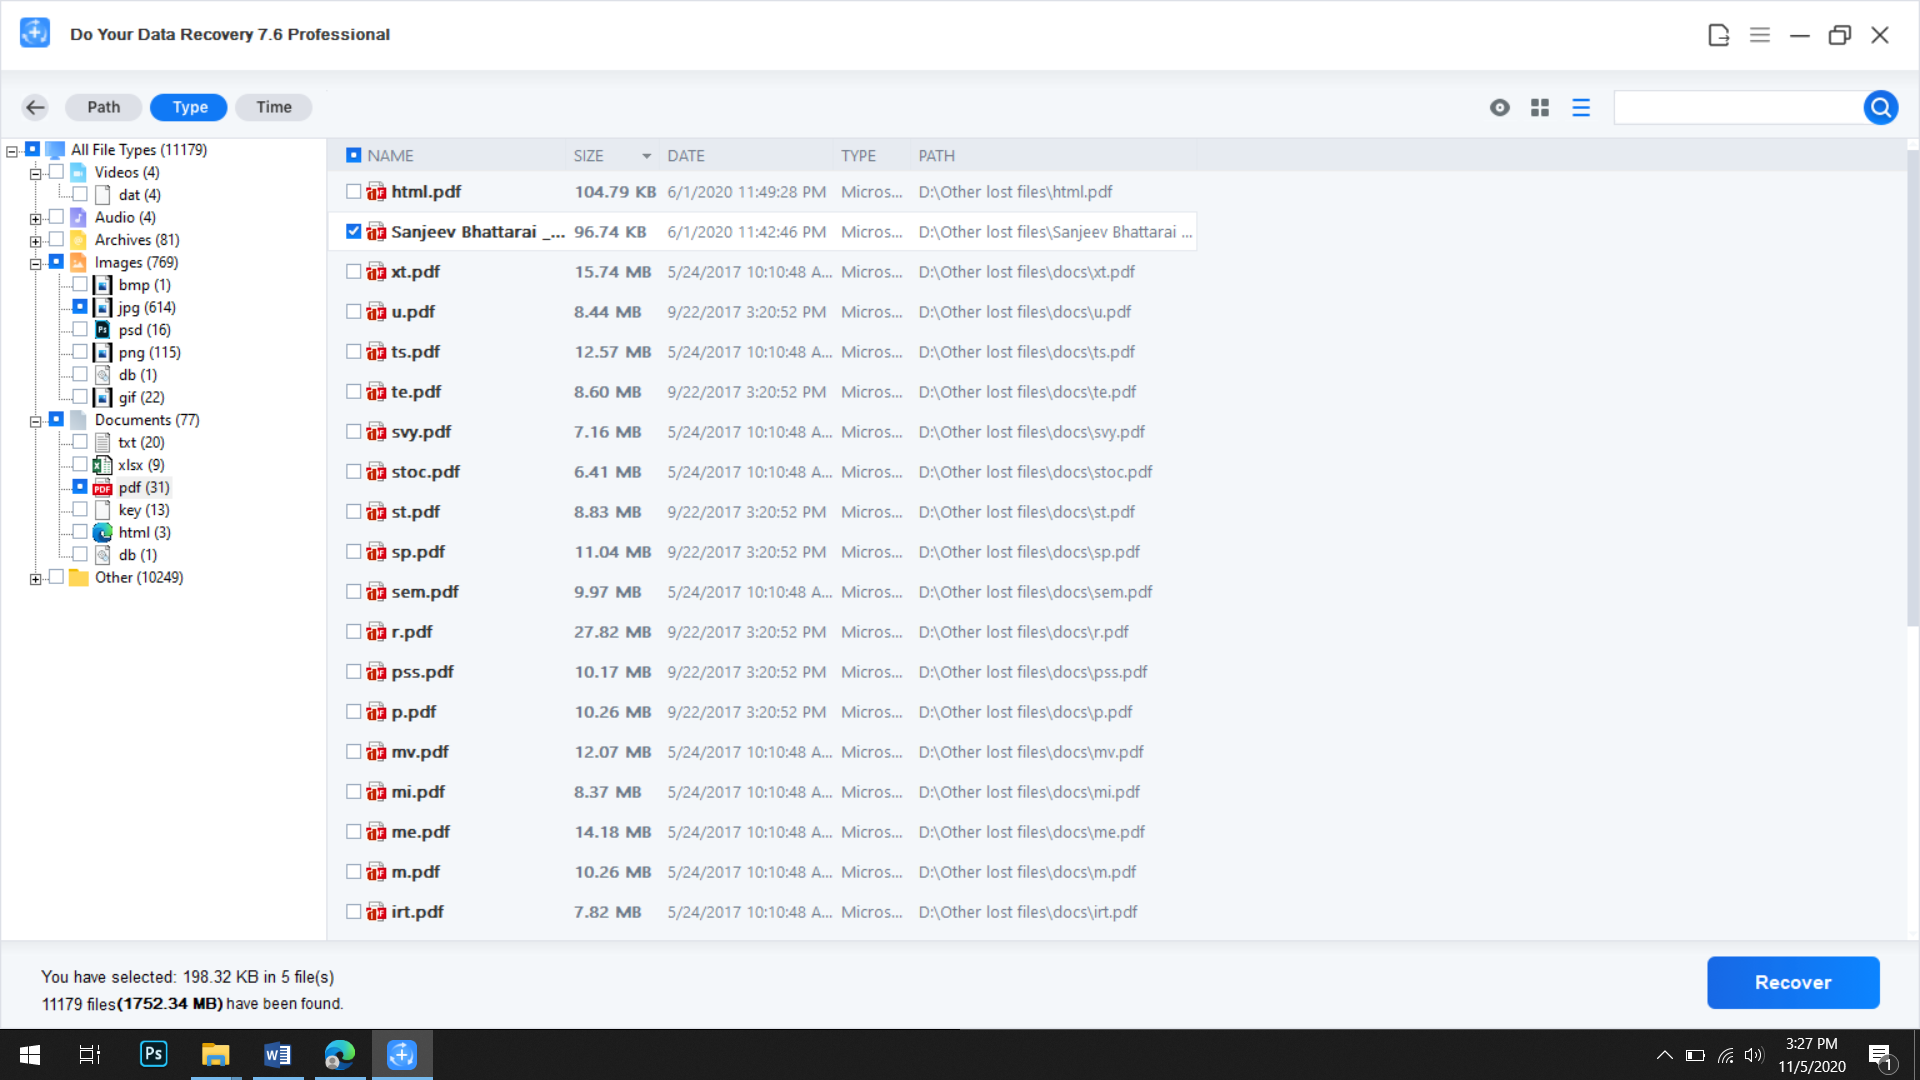
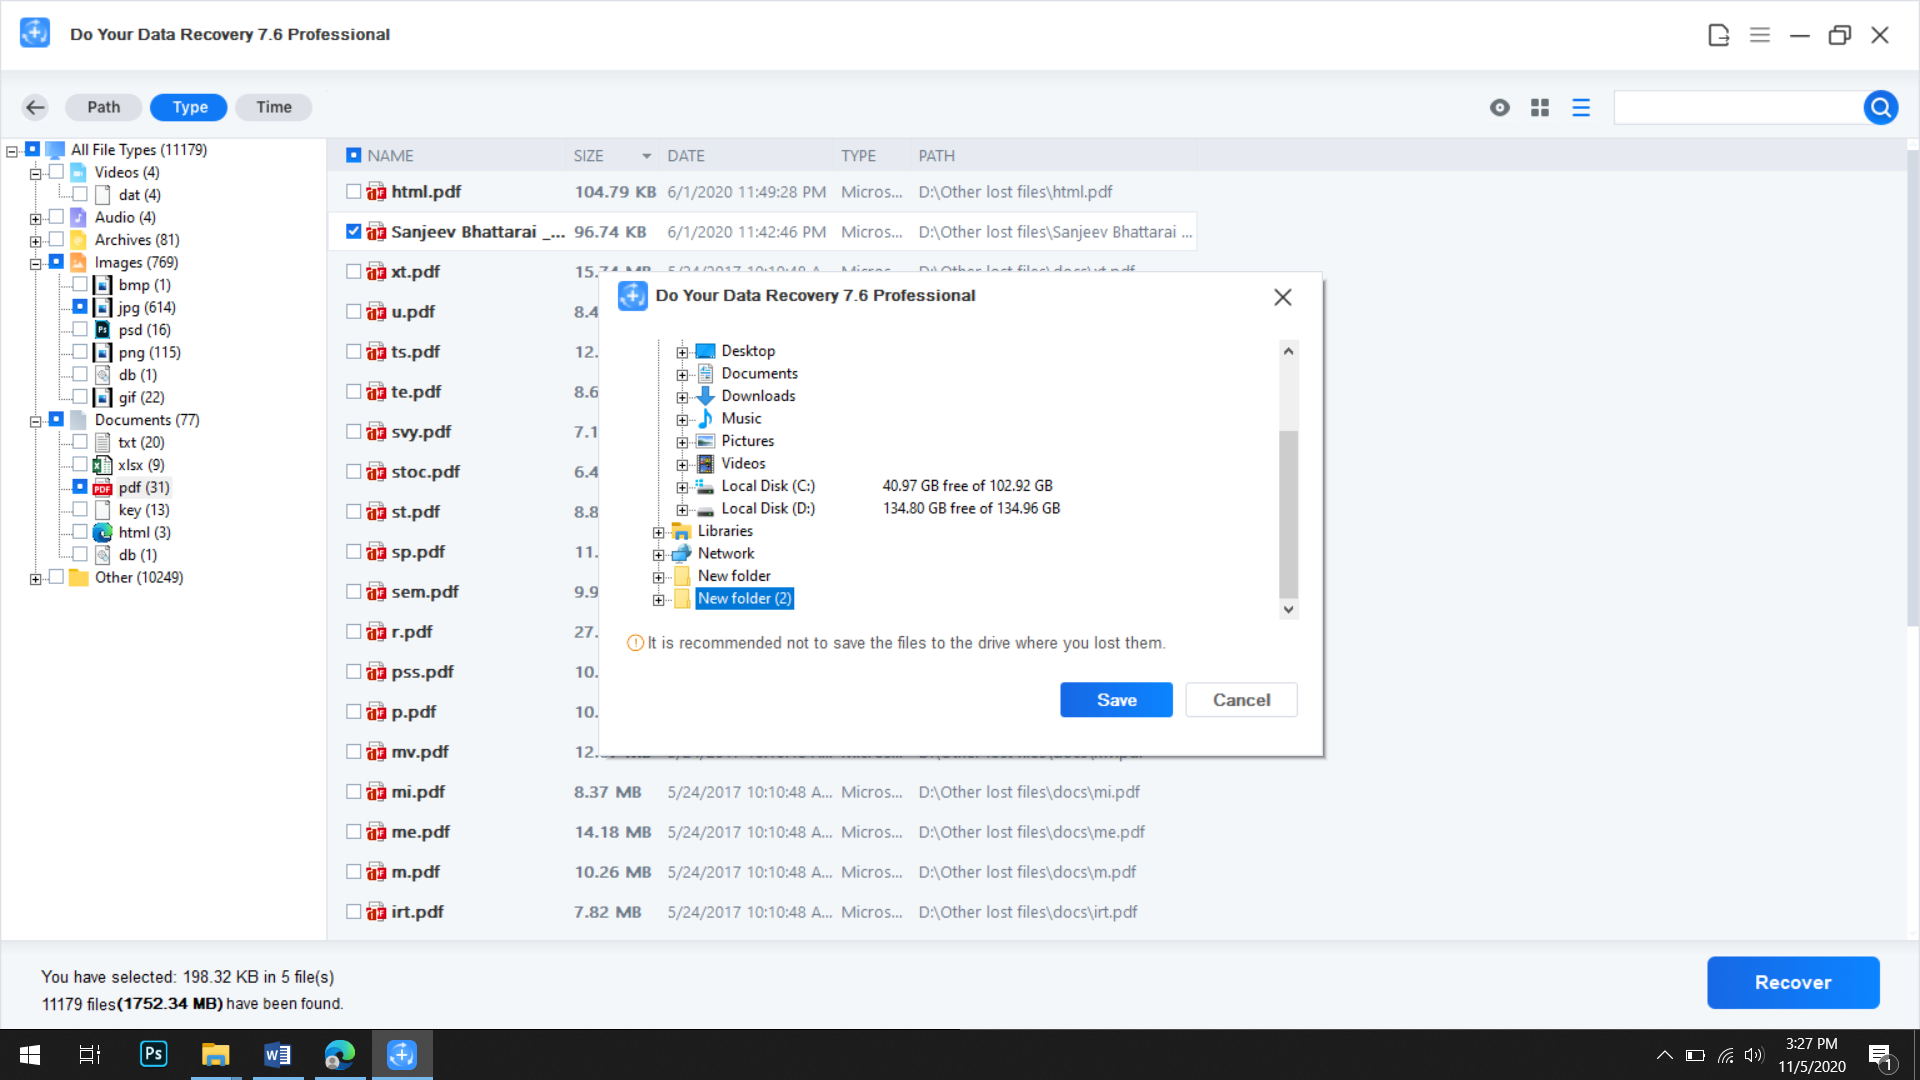
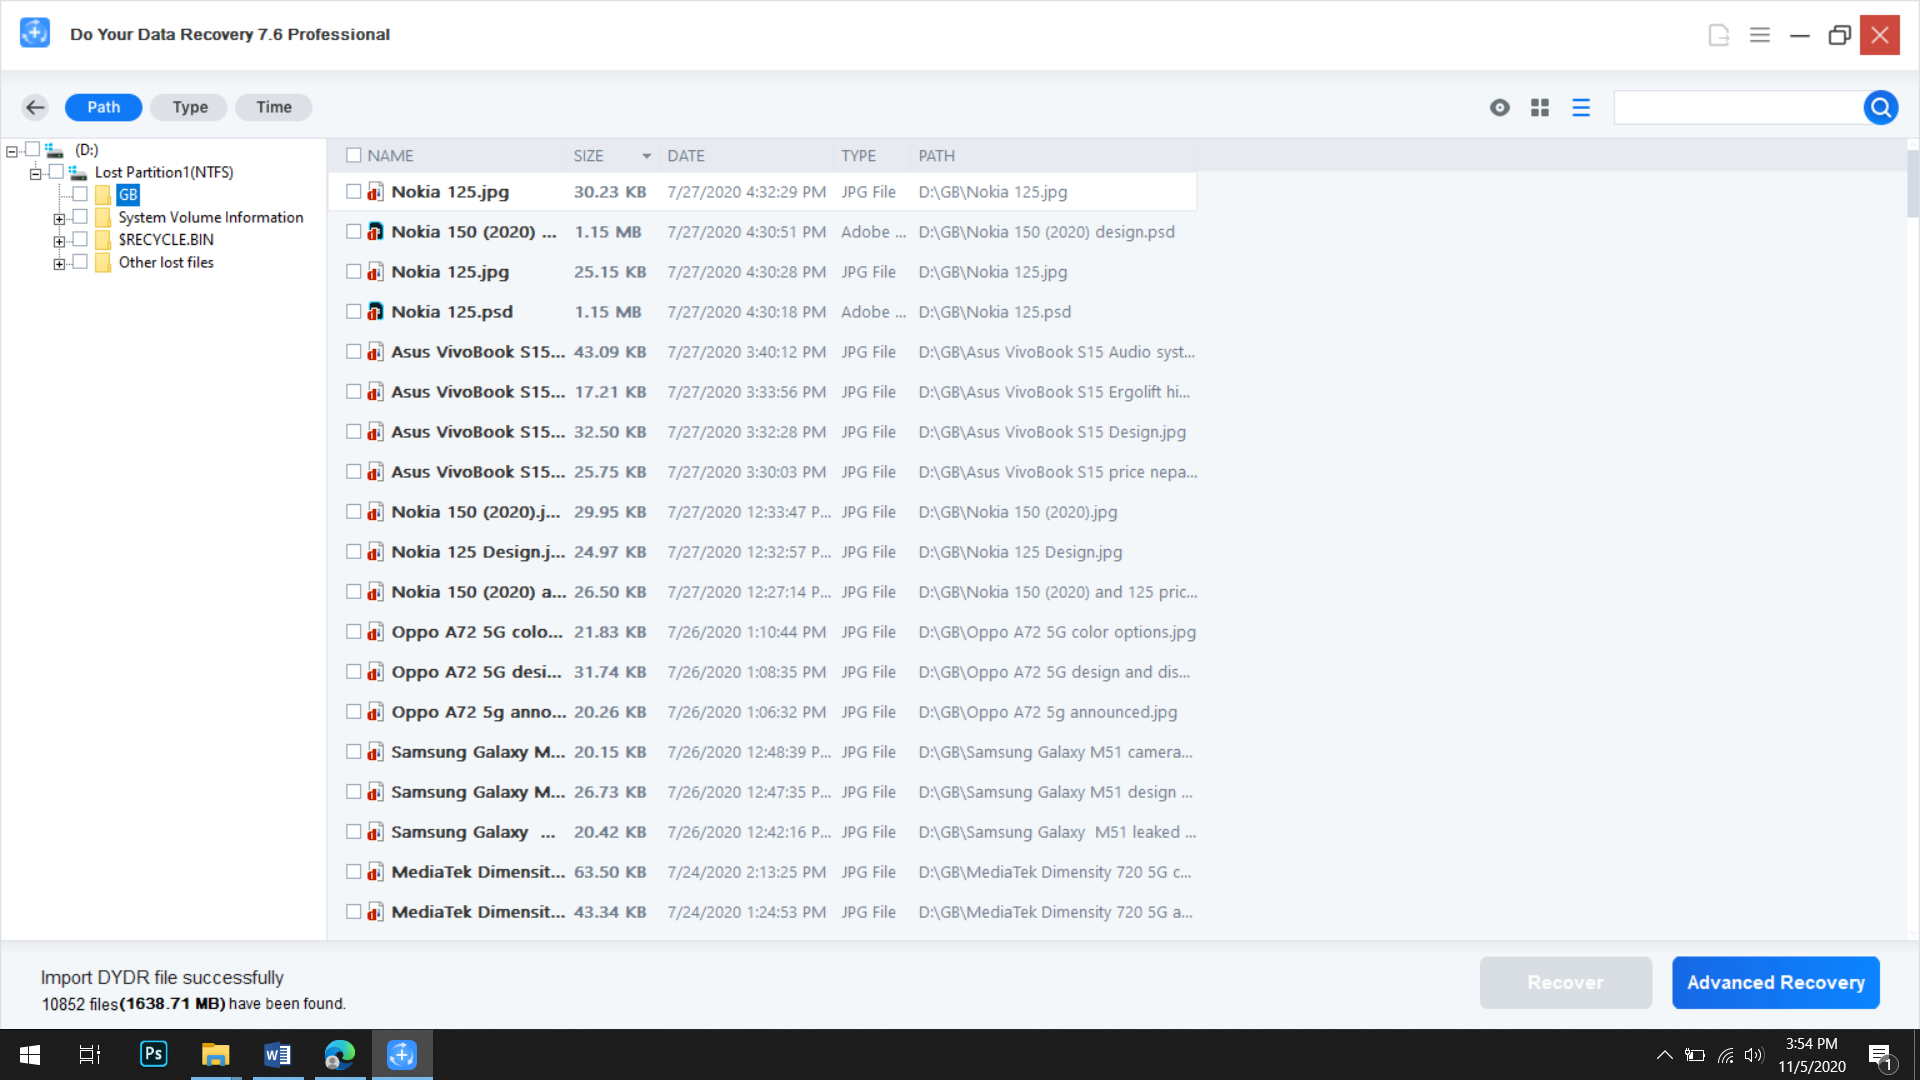
Once completed, the search results can be filtered according to the path, file type, and time. Users can select the files that they need and hit the Recover button. The tool does not recommend saving files on the same drive where they were originally saved. Users can even choose to store the recovered files on a storage media.
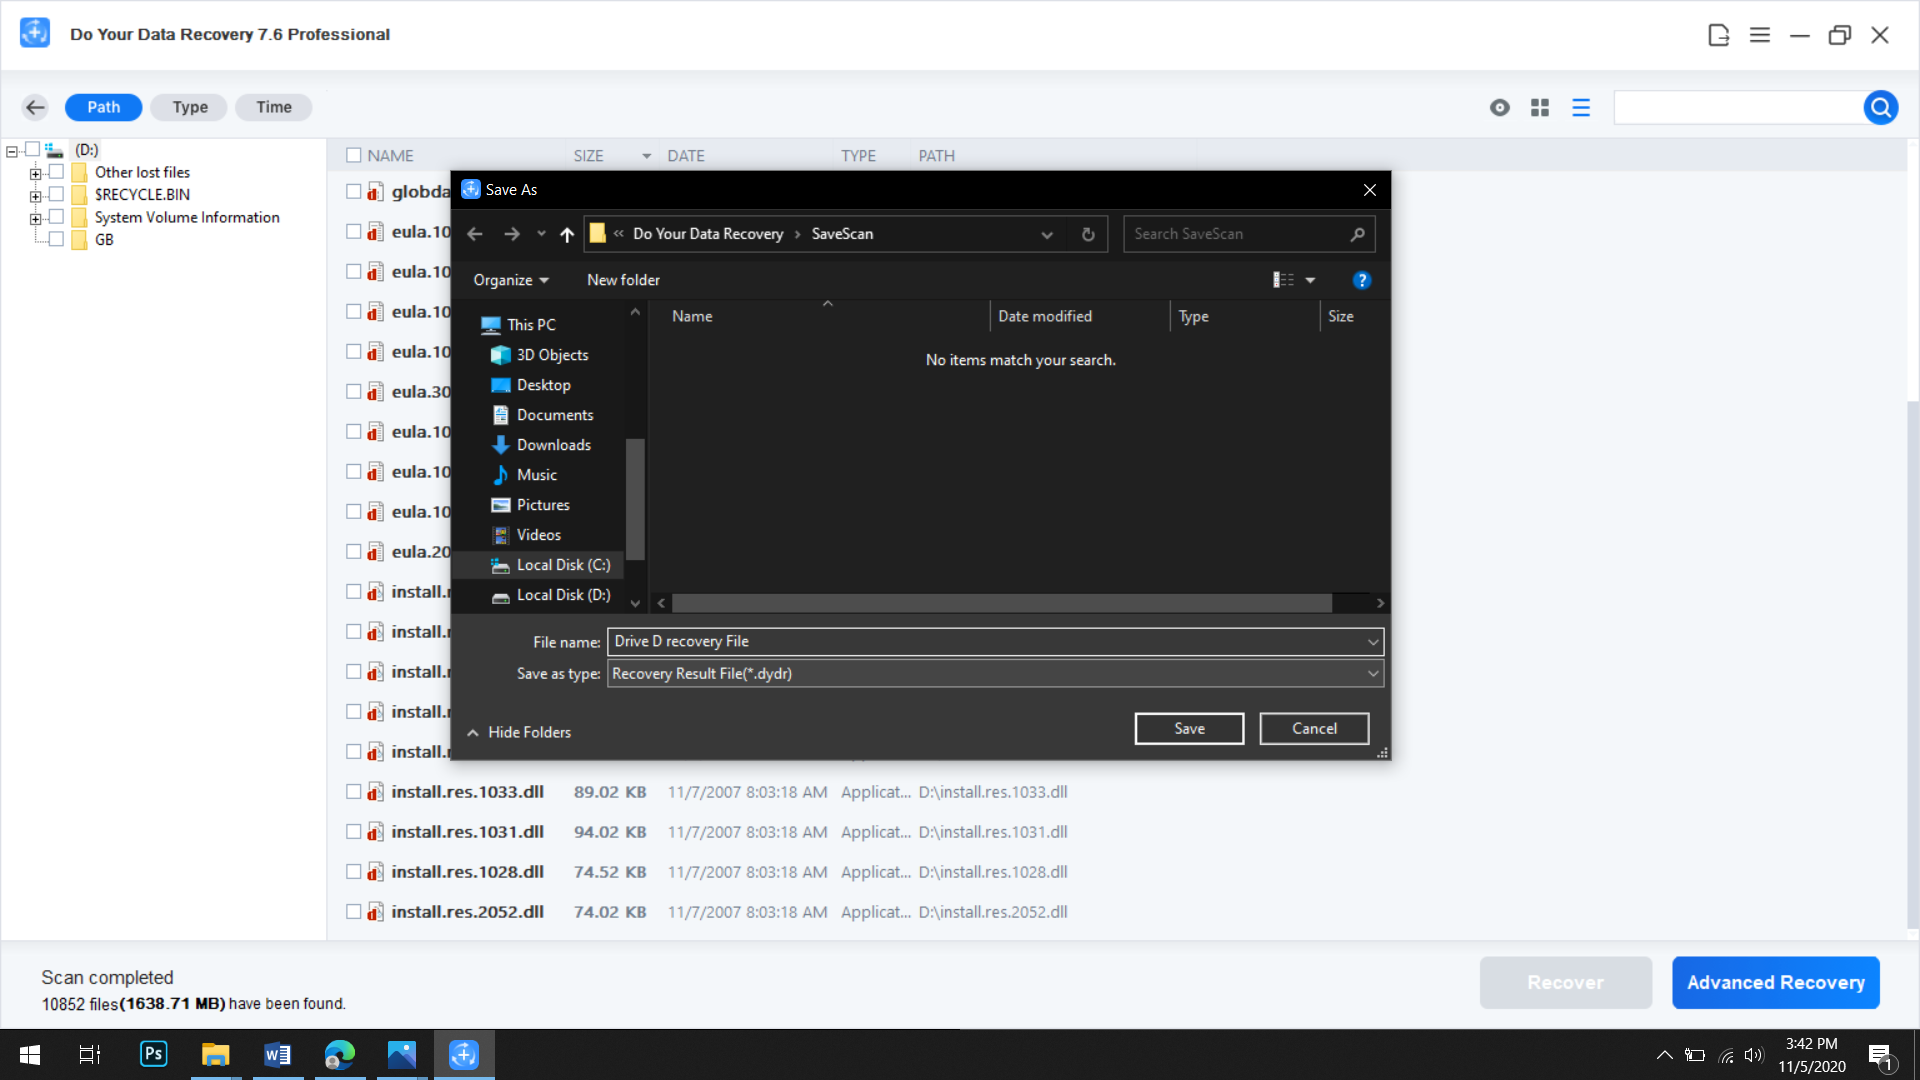
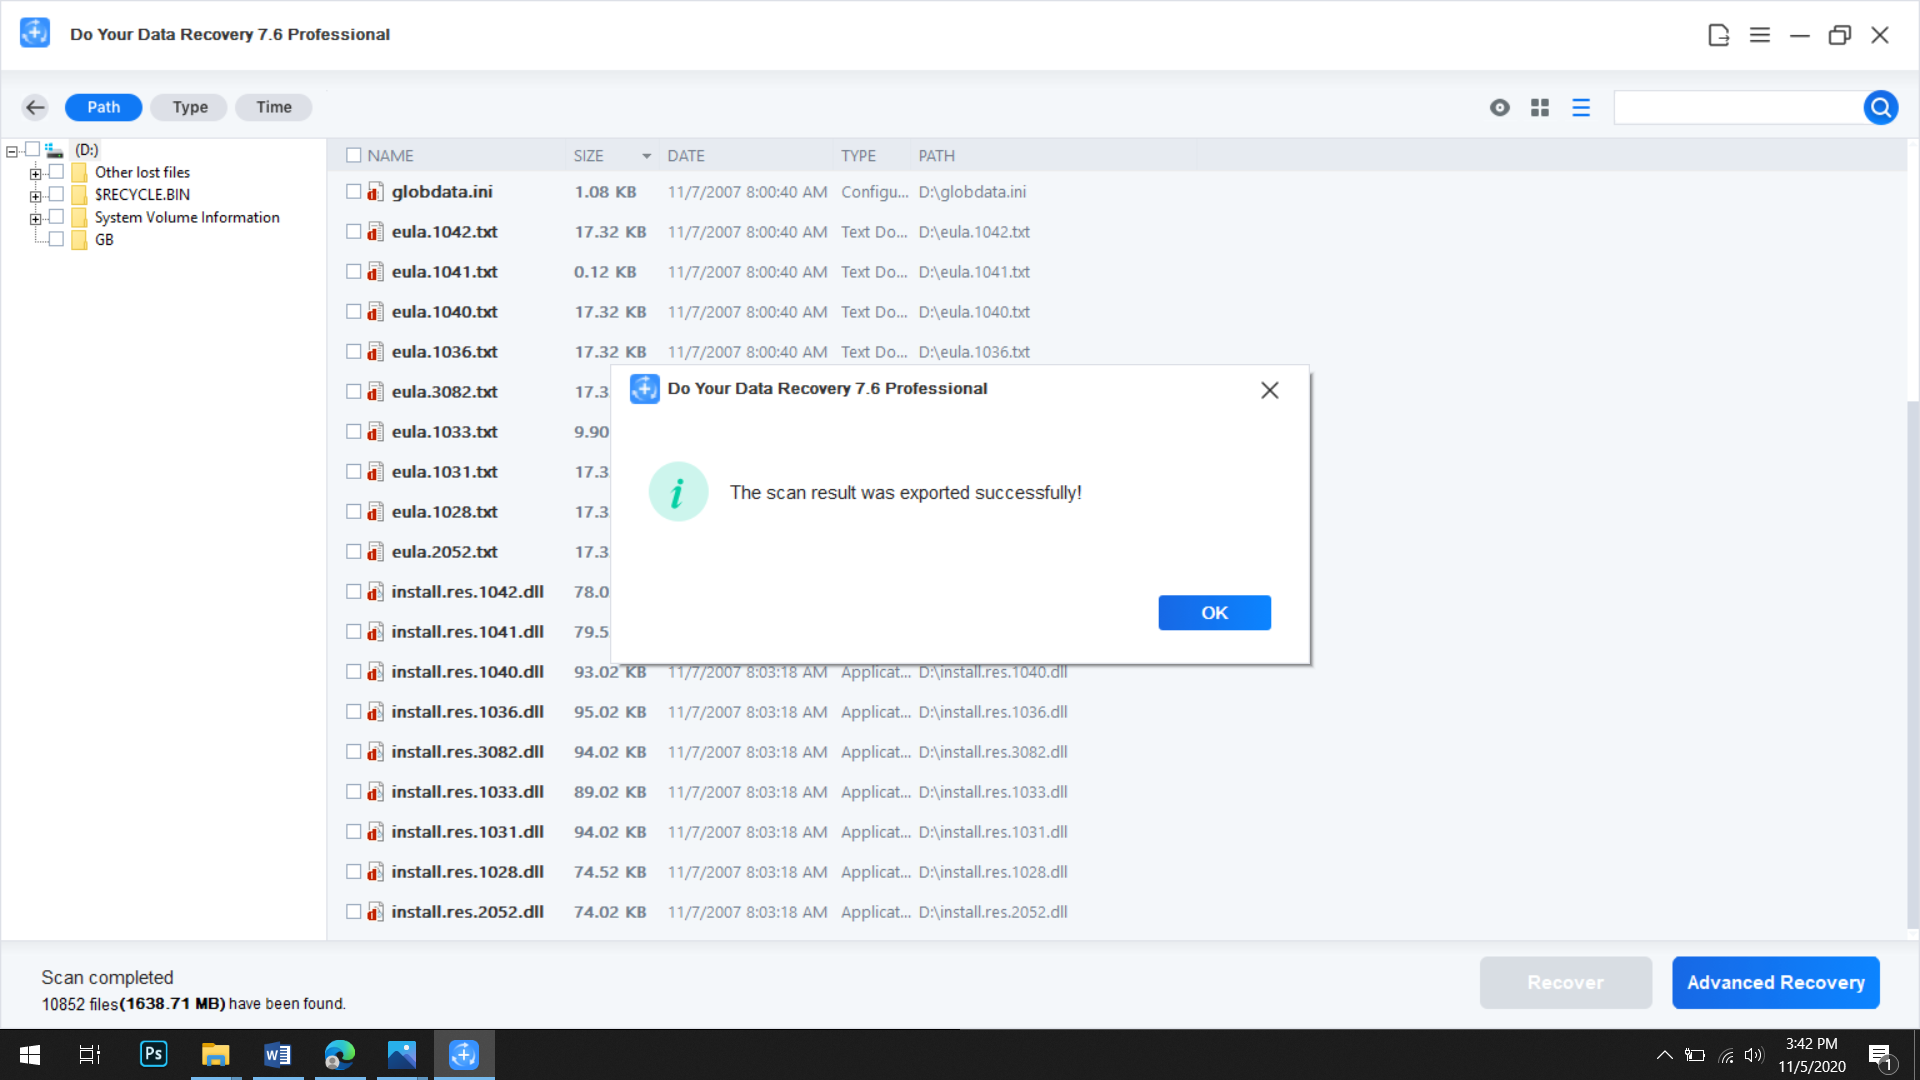
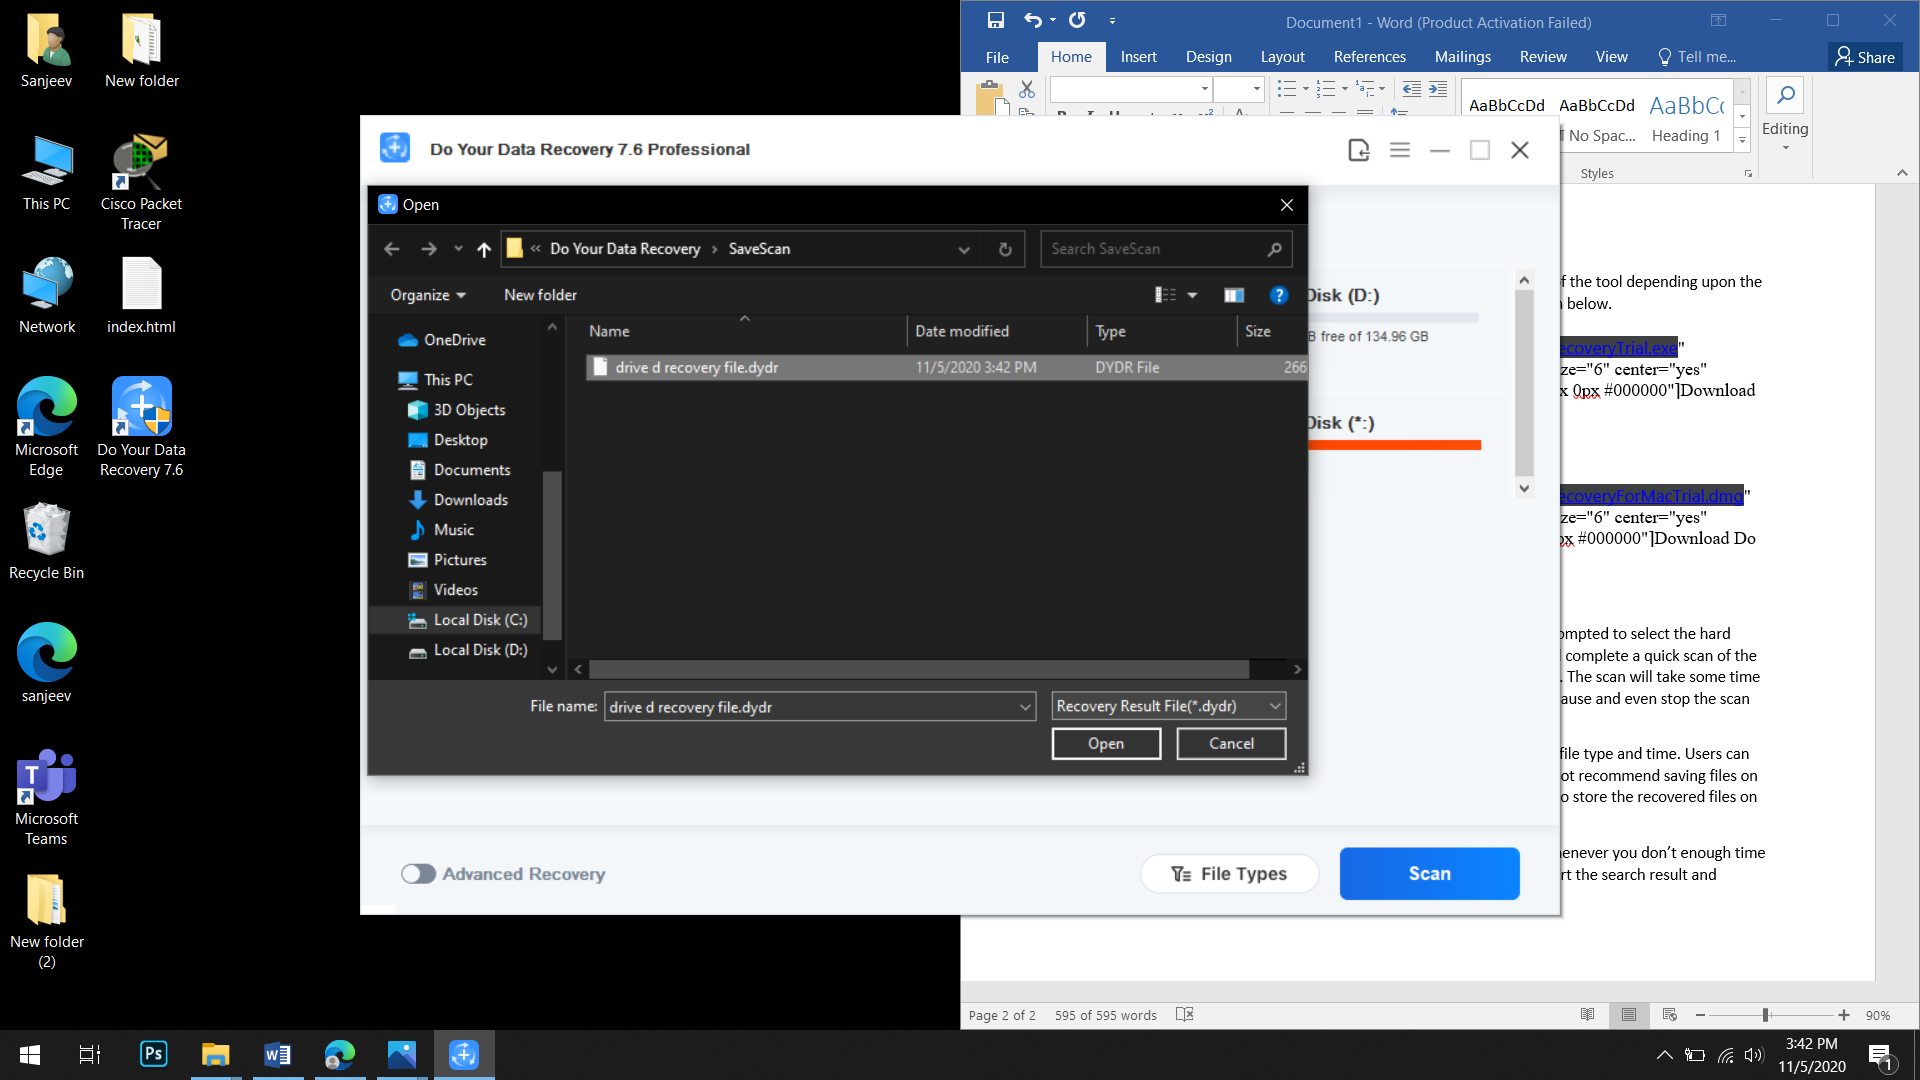
The neat thing about this tool is that you can export your search result whenever you don’t have enough time to go through all the search results. Whenever you are free, you can import the search result and recover items that you couldn’t recover during the initial search.




![Best Gaming Laptops in Nepal Under Rs. 250,000 (रु 2.5 Lakhs) [2025] Best Gaming Laptops Under 2.5 lakhs in Nepal [Feb 2025 Update]](https://cdn.gadgetbytenepal.com/wp-content/uploads/2025/02/Best-Gaming-Laptops-Under-2.5-lakhs-in-Nepal-Feb-2025-Update.jpg)
![Best Gaming Laptops in Nepal Under Rs. 120,000 (रु 1.2 Lakhs) [2025] Best Budget Gaming Laptops Under Rs 120000 in Nepal 2025 Update](https://cdn.gadgetbytenepal.com/wp-content/uploads/2025/05/Best-Budget-Gaming-Laptops-Under-Rs-120000-in-Nepal-2024-Update.jpg)
![Best Laptops Under Rs. 80,000 in Nepal [2025] Best Laptops Under 80,000 in Nepal March 2025 Update](https://cdn.gadgetbytenepal.com/wp-content/uploads/2025/03/Best-Laptops-Under-80000-in-Nepal-March-2025-Update.jpg)
![Best Gaming Laptops in Nepal Under Rs. 200,000 (रु 2 Lakhs) [2025] Best gaming lapotp under 2 lakhs Nepal Feb 2025](https://cdn.gadgetbytenepal.com/wp-content/uploads/2025/01/Best-Gaming-Laptops-Under-2-Lakh-Nepal-Feb-2025-Update.jpg)

![Best Mobile Phones Under Rs. 15,000 in Nepal [Updated 2025] Best Phones Under 15000 in Nepal 2024 Budget Smartphones Cheap Affordable](https://cdn.gadgetbytenepal.com/wp-content/uploads/2024/03/Best-Phones-Under-15000-in-Nepal-2024.jpg)
![Best Mobile Phones Under Rs. 20,000 in Nepal [Updated] Best Mobile Phones Under NPR 20000 in Nepal 2023 Updated Samsung Xiaomi Redmi POCO Realme Narzo Benco](https://cdn.gadgetbytenepal.com/wp-content/uploads/2024/01/Best-Phones-Under-20000-in-Nepal-2024.jpg)
![Best Mobile Phones Under Rs. 30,000 in Nepal [Updated 2025] Best Phones Under 30000 in Nepal](https://cdn.gadgetbytenepal.com/wp-content/uploads/2025/01/Best-Phones-Under-30000-in-Nepal.jpg)
![Best Mobile Phones Under Rs. 40,000 in Nepal [Updated 2025] Best Phones Under 40000 in Nepal 2024 Smartphones Mobile Midrange](https://cdn.gadgetbytenepal.com/wp-content/uploads/2024/02/Best-Phones-Under-40000-in-Nepal-2024.jpg)
![Best Mobile Phones Under Rs. 50,000 in Nepal [Updated 2025] Best Phones Under 50000 in Nepal](https://cdn.gadgetbytenepal.com/wp-content/uploads/2025/01/Best-Phones-Under-50000-in-Nepal.jpg)
![Best Flagship Smartphones To Buy In Nepal [Updated] Best flagship phone 2025](https://cdn.gadgetbytenepal.com/wp-content/uploads/2024/07/Best-Flagship-Phones-who-is-it-ft-1.jpg)