Samsung Ad
Home Blog Page 578

A study suggests lower risk of COVID-19 infection to people in high altitude regions

Our honorable Prime Minister claims that Nepalese are more immune to the COVID-19 virus than people of other countries. This statement sounds absurd, mostly because there is no research to back it up. However, new research somewhat validates its statement. Somewhat, and not in anyway PM implied. The research regarding the effect (lower risk) of COVID-19 on people living at a high altitude was published in Respiratory Physiology & Neurobiology.

It claims that people living at a high altitude bear a lower risk to experience the worst effect of COVID-19. It states that these people are better adapted to low blood oxygen levels. Now, we know that COVID-19 drastically decreases the level of oxygen in the blood. Thus, this might be one of the reasons why people at a higher altitude are least affected.

COVID-19: Lower risk to people in high altitude?

The researchers studied the cases in Bolivia, Ecuador, and Tibet to validate their research. They claim to have compared the COVID-19 cases in both high and low lands of the mentioned places. It is a known fact that people living at a higher altitude have increased ventilation, augmented arterial oxygen transport, and higher tissue oxygenation. That’s because they are constantly exposed to low oxygen levels. Moreover, they also have low levels of ACE2 enzyme. This is the enzyme that the virus needs to infect the host cells.

The trend in Bolivia, Tibet, and Ecuador

The study states that there is a huge gap in the level of the affected population in the areas that are 3000 meters above sea level. As a matter of fact, in Bolivia, the difference in infection rate was three folds lower than its lowlands. Furthermore, Tibet’s data suggests that the spread of the virus there does not correspond to the global trend; despite Tibet being relatively close to Wuhan, the epicenter.

covid 19 trend tibet

Lhasa (capital region of Tibet), is located at an altitude of 3500 meters above sea level. Now, the distance between Wuhan and Lhasa is around 2000 miles. However, they are well connected by train and bus. So, travel is frequent between these two places. Still, Tibet had a lower rate of COVID-19 infected people. Moreover, the data also suggests that 54% of the recorded case were completely asymptomatic.

Also Read: COVIDNP Nepali app launched to trace corona victims 

Similarly, in Bolivia, there were a total of just 54 cases in high altitude. Whereas the number below 2500 meters was 140. Furthermore, Ecuador, a country severely hit by the pandemic, also showed a similar trend. It had 722 cases in the higher-altitude region whereas in the coastal region the number was 2943. That indicates four-fold lower cases in the high-altitude region.

The Trend in Nepal

Now, a similar trend can be observed in Nepal as well. As per the infographic, we can see that the most affected region in Nepal is the Terai region. There are significantly more cases in Terai than in the Mountain region. And a greater infection rate means that there is a high mortality rate in the lower altitude region. So, maybe our prime minister was not completely wrong. Well, not all of us but those living at a higher altitude might be more immune to the COVID-19 after all.

covid 19 cases trend 13th june nepal

However, better adaptation to low oxygen levels is not the only reason for this trend. Factors such as drastic day-night temperature change, air dryness, UV level have also been cited.

High-altitude regions have a high level of UV radiation. And this radiation can alter the molecular bond between DNA and RNA. Thus, UV radiation can act as a free and abundant natural sanitizer. Furthermore, air density is low at high altitude. This results in a greater distance between molecules. As a result, the size of the airborne virus might be smaller here than at the sea level. Other factors include lifestyle, obesity, chronic disease, and age.

Now, though this result claims that people living at a high altitude are at a lower risk of being infected by COVID-19, it by no means suggests that they should not follow social distancing rule. They should continue to wash their hands regularly and wear a face mask to remain safe.

Budget-friendly Nokia C2 Launched in Nepal for Rs. 9,299

0

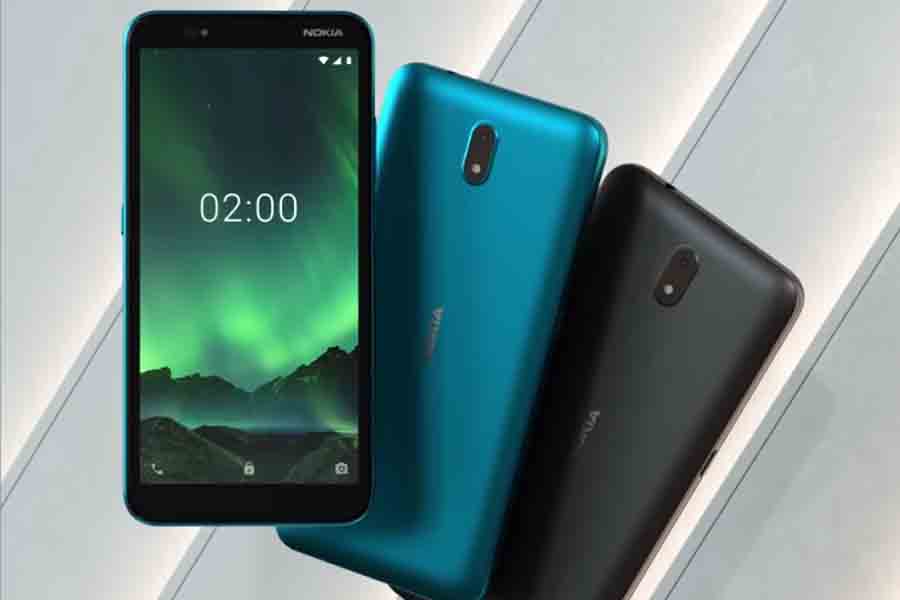
Teletalk Pvt. Ltd, the authorized importer of Nokia smartphones in Nepal, has announced a budget-oriented Nokia C2 in Nepal. Nokia has been launching some good entry-level phones lately, and the Nokia C2 follows the same trend of offering decent specs at an affordable price.

Nokia C2 Overview

At first glance, one can’t distinguish between Nokia C2 and its predecessor as the design has remained unchanged. Nokia C2 stands a little taller due to its 5.7-inch display. The HD+ IPS panel boasts an aspect ratio of 18:9. Other than that, other design features have remained the same including the polycarbonate body, thick bezels around the screen, camera and button placements, and the dedicated Google Assistant button.

Under the hood, the device packs in a 1.4Ghz Unisoc chipset (28nm) which is coupled with 1GB of RAM and 16GB of internal storage. It isn’t a powerful setup so to balance things out Nokia has loaded the device with Android 9 Pie (Go edition). It might handle normal usage but don’t expect too much from the device as it is clearly targetted at first-time users.

Nokia C2 Color Options, Specs, Luanch and Price in Nepal

Cameras & Battery

The device comes with a 5MP camera at the back. The camera bump at the top center houses both the sensor and an LED flash. The setup may sound similar to that of Nokia C1 but the sensor, here, comes with a smaller aperture of f/2.2. For selfies, Nokia has included another 5MP sensor on the front. This one too has an LED flash accompanying it.

Nokia has bumped the battery capacity from 2,500mAh to 2,800mAh which would be enough given the specs of the device. It can be charged using a 5W charger provided inside the box. At this price range, we are not surprised by the MicroUSB port. Unlike its predecessor, Nokia C2 comes with 4G connectivity. It is quite an upgrade as the 4G in Nepal is now on a rise. Other connectivity options include Wi-Fi, Bluetooth, triple card slot (including a MicroSD slot).

Nokia C2 Specifications

Display 5.7-inch IPS panel
Resolution HD+
CPU 1.4Ghz quad-core Unisoc processor
RAM 1GB
Storage 16GB, expandable with MicroSD slot
Software and UI Android 9 Pie (Go edition)
Rear Camera 5MP f/2.2 sensor with Flash
Front Camera 5MP sensor with Flash
Audio 3.5mm Headphone jack, FM Radio receiver
Connectivity Wi-Fi 802.11 b/g/n , Bluetooth 4.2
Battery 2800mAh
Color Options Cyan, Charcoal

Nokia C2 Price In Nepal & Availability

The official price of the Nokia C2 price in Nepal is Rs. 9,299. You can purchase the phone from mobile retail shops all over Nepal starting June 14, 2020.

Model Name Price in Nepal
Nokia C2 NPR. 9,299

Check out our review of the Samsung Galaxy S20 & S20+

Samsung Galaxy Fold 2 rumor roundup

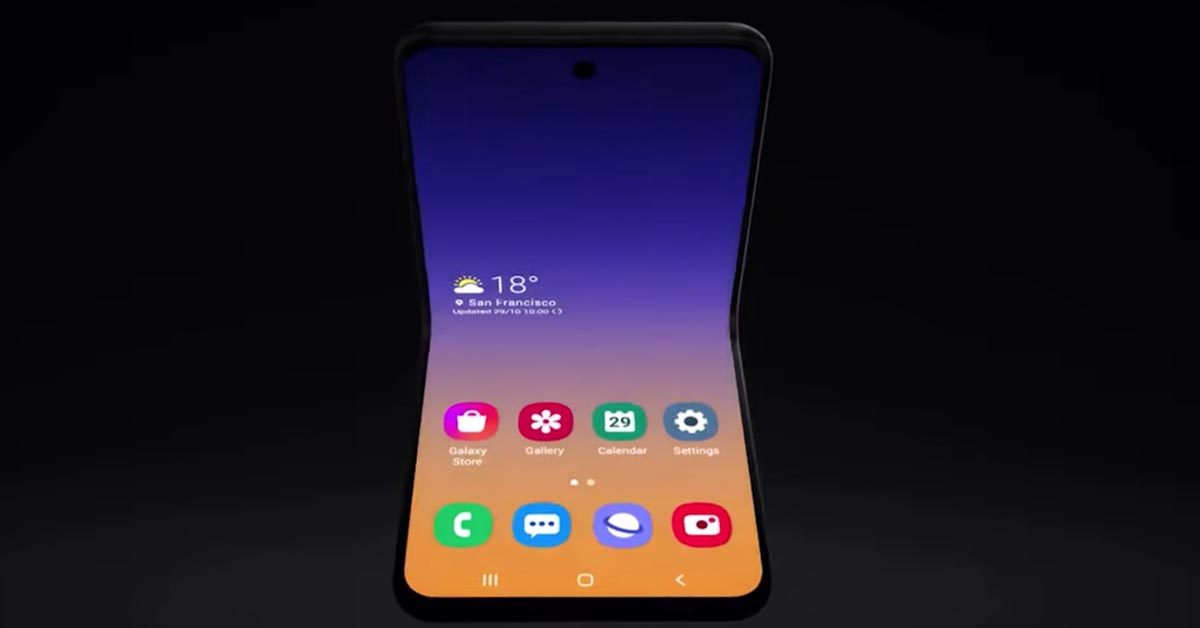
2019 was the year when foldable smartphones really started to make waves in the market. Last year we saw some amazing innovations from the likes of Samsung, Huawei and more. The Samsung Galaxy Fold was easily one of the most innovative designs of the lot. Sure, there were mixed reviews but it was undoubtedly an innovative smartphone. However, smartphones such as the Huawei Mate X and Motorola Razr 2019 did bring in some serious competition. But Samsung seems to be ahead of the curve when it comes to foldable smartphones. That’s because rumors are already swirling about the new Samsung Galaxy Fold 2. And as its name suggests, it will be the successor to last year’s Galaxy Fold.

Samsung Galaxy Fold 2 Overview

The Galaxy Fold 2 was actually supposed to be launched during the Mobile World Congress. However, the COVID-19 pandemic delayed the launch. Now, it is being touted that the device will launch during the Unpacked event alongside the Galaxy Note 20 series. It will be an online-only event and will take place on August 5.

Design and Display

The rumor is that Samsung will stick to the book-style design akin to the original Galaxy Fold. As for the material, it is likely to be either an aluminum-glass finish or a stainless steel-ceramic finish. The display this time around will be bigger than that of its predecessor. Rumor is that the total size of the screen i.e when the phone is unfolded will be 7.7-inches. Furthermore, the display will boast a refresh rate of 120Hz. The display panel will be made up of the same ultra-thin glass that we saw in the Galaxy Z Flip.

As the overall size of the screen has increased, it is only obvious that the size of the external screen has increased. On the Samsung Galaxy Fold 2, the external screen is supposedly of 6.23-inches. Now, that does mean that it will have a tall aspect ratio. However, it will still be more useful than its predecessor.

There have been contradicting rumors about the technology that has been used to incorporate the front camera. Some claim that it will have the Infinity-O punch-hole design. However, other reports suggest that there will be an under-display camera. Whatever it may be, this just means that there will be more screen for users to enjoy.

samsung galaxy fold 2 rumors s-pend display

Cameras

Leaks have suggested that the Samsung Galaxy Fold 2 will have the same rear cam setup as that of the Galaxy S20+. That means there will be a triple camera array with a 12MP main sensor, a 64MP 30X zoom camera, and a 12MP ultra-wide lens. However, some other rumors suggest that the ultra-wide lens will be a 16MP sensor instead.

Now, we haven’t heard much about the front camera. So, until any news comes out, it is safe to assume that it will sport the same 10MP lens as that of its predecessor.

Battery & Performance

The original Galaxy Fold sported a 4380mAh battery. However, as the screen size is expected to change this time around, the reasonable expectation would be that the battery capacity will increase too. Similarly, I hope that Samsung improves the charging speed on this one. Hopefully, this new device will be capable of either a 25W or 45W charging.

However, there have been contradicting rumors about this too. Some suggest that the Fold 2 will stick to the previous 15W charging. Whereas others suggest that it will get that 25W upgrade. But I would say that don’t be too optimistic about the charging speed of the Fold 2. Furthermore, we will most probably get to see the PowerShare reverse wireless charging on this device too.

Galaxy Fold was powered by the Snapdragon 855 SoC. Now, that was the flagship chipset then. Thus, I would expect the Fold 2 to be powered by the current flagship chipset i.e the Snapdragon 865. Furthermore, this speculation has been somewhat confirmed by Max Weinbach. And his leaks have a record of turning out to be true most often.

S-Pen?

This rumor has been going around for a while now. Many had suggested that Note 20 will not be the only device to feature an S-Pen. The fact that the Fold 2 has a huge display made it a perfect device that could well sport an S-Pen. If it was to feature on the Fold 2, it would have certainly added a host of exciting features to the device.

However, recent leaks suggest otherwise. And the reason behind it is the UTG display that the Fold 2 sports. Apparently, manufacturers were unable to make the ultra-thin glass capable of withstanding S-Pen’s pressure. They tried using polyimide films instead. However, it was not seen as a viable alternative. Thus we will have to wait till 2021 to see a stylus in a folding phone

Conclusion

Just to clear it out, the things mentioned out here are all rumors. They might be from reliable sources and might well turn out to be true. However, at this point, they are nothing more than rumors. So take this information with the pinch of a salt. Now, as there is still some time left before the launch date, more rumors are likely to pop out. But don’t you worry as we will keep you up to date with whatever is going on!

Xiaomi Mi Notebook 14 launched alongside a “Horizon Edition”

0

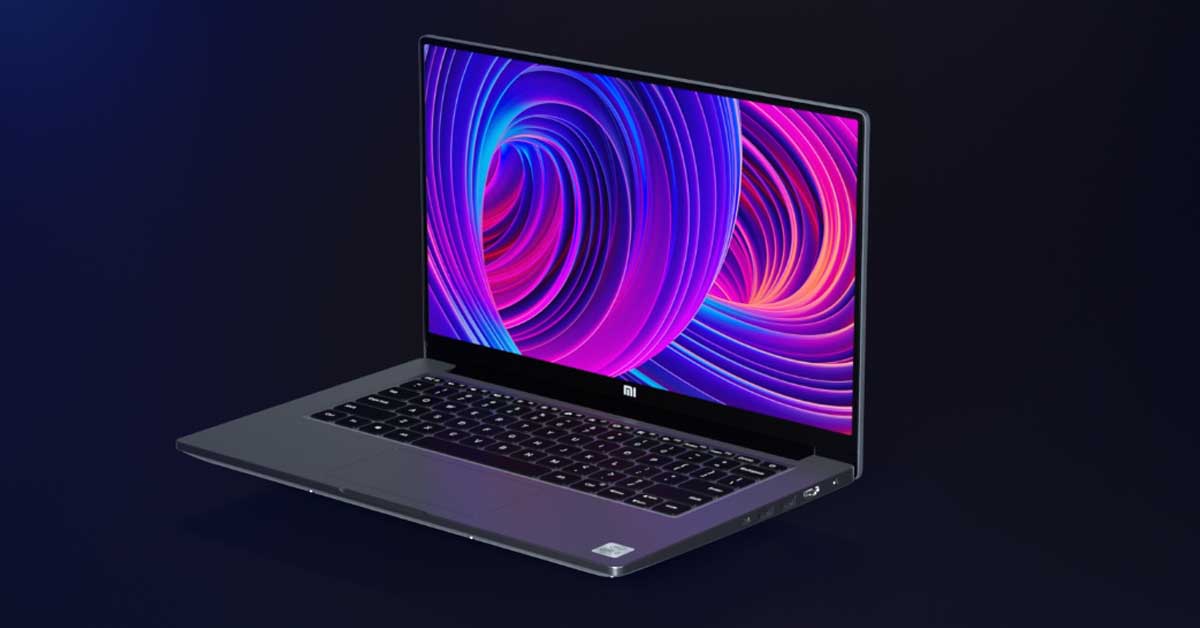
After enormous success with its Redmi line up of smartphones, Xiaomi has now entered the laptop business in India. To start things off, the company today launched the Mi Notebook 14, and Mi Notebook 14 Horizon Edition exclusively for the Indian market. Check out the specs, features, expected price, and availability of Mi Notebook 14 and its Horizon Edition in Nepal.

Xiaomi Mi Notebook Horizon Edition Overview

Design and Display

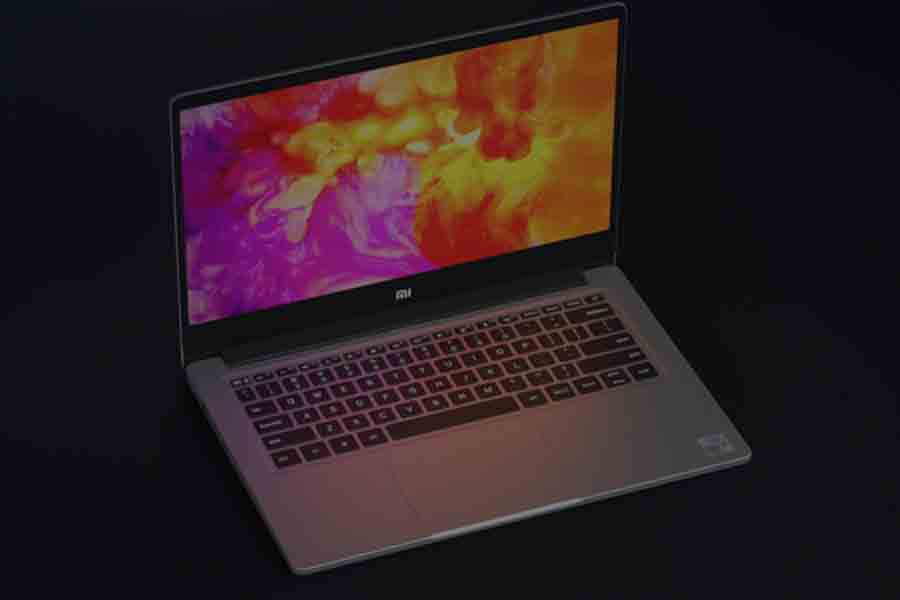
The Mi Notebook 14 Horizon Edition features an all-metal design. The body of the laptop is composed of an Aluminium-Magnesium alloy. It has an additional layer of sand-blasting on top to minimize the eventual wear and tear. This ultrabook’s width is the same as that of an A4 size paper, though it is a little longer. Xiaomi has fitted a 14-inch display inside a form factor of a 13-inch laptop.

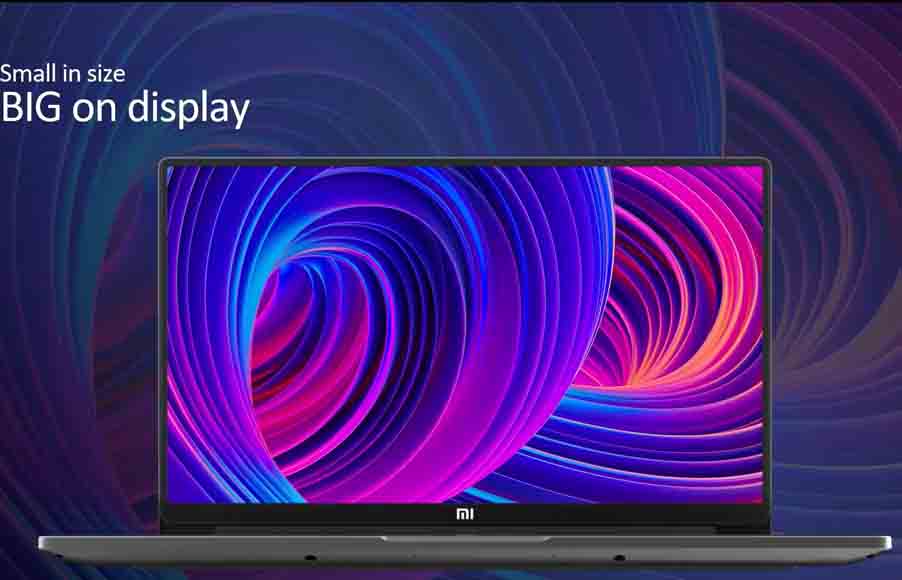
How did they do that? The Horizon Edition comes with skinny bezels (3mm) on the three sides of the screen. With such thin bezels, there is no room to fit in a webcam. But Xioami will be providing Mi webcam HD bundled with the ultrabook. The bottom bezel is thicker than the rest and encloses the “Mi” branding. The device has a screen to body ratio of 91%.

Xiaomi Mi NoteBook 14 horizon edition display

Talking about the display, there is a 14-inch FHD screen with an Anti-glare layer on top. Xiaomi is calling it the Horizon Display. The display has a resolution of 1920 x 1080 pixels and an aspect ratio of 16:9. The viewing angle on this one is 178-degree.

Keyboard and Trackpad

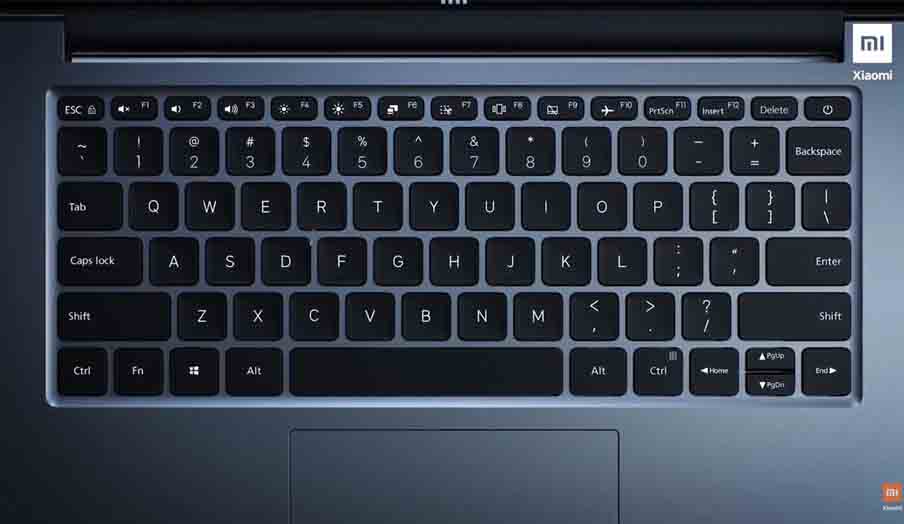
The Mi Notebook 14 Horizon Edition comes with a traditional chiclet keyboard. Because of the size constraints, it doesn’t have a dedicated numeric keypad. Xiaomi has used a scissor-switch keyboard, which is quite common on laptops. The keys have a key-travel of about 1.3mm, while the multi-touch trackpad is also spacious at 11cm (W) x 5.7cm (H).

Mi NoteBook 14 Horizon Edition keyboard

Also Read: RedmiBook 16 with AMD Ryzen 4000 CPU launched

Performance and Memory

There are two variants of Mi Notebook 14 Horizon Edition. Both of them are powered by the Intel 10th Gen Comet Lake processors. However, it would have been great if they included the latest Icelack CPUs. While the base variant packs in Core i5 – 10210U processor, the top-end model has Core i7 – 10510U. Both processors have four cores and eight threads but the i7 model can reach higher clock speeds. Both the variants have an integrated NVIDIA GeForce MX350 GPU so that you can also do casual gaming with it.

The Horizon Edition comes with 8GB of DDR4 RAM and 512GB SSD storage. While the base variant uses a slower SATA III SSD, the top-end model features much faster PCIe Gen 3 NVMe SSD. Other than that, there is no difference between the two options.

Battery and Ports

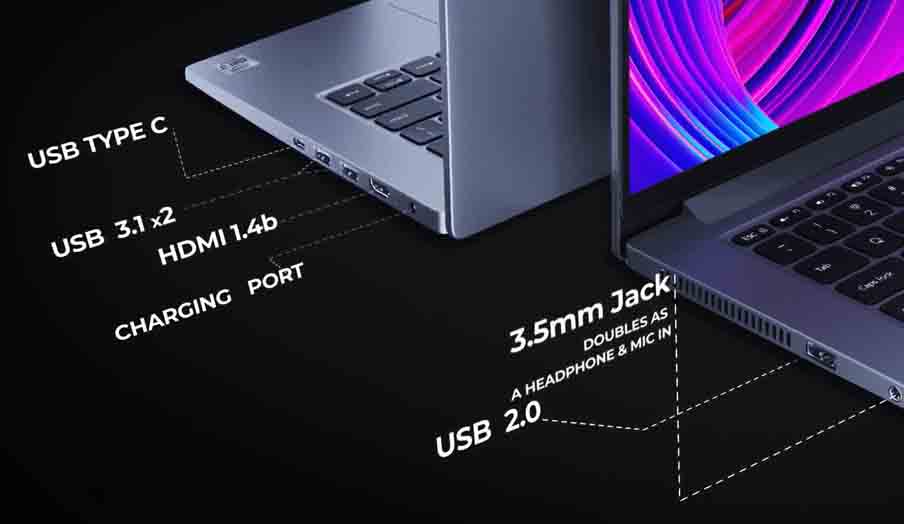
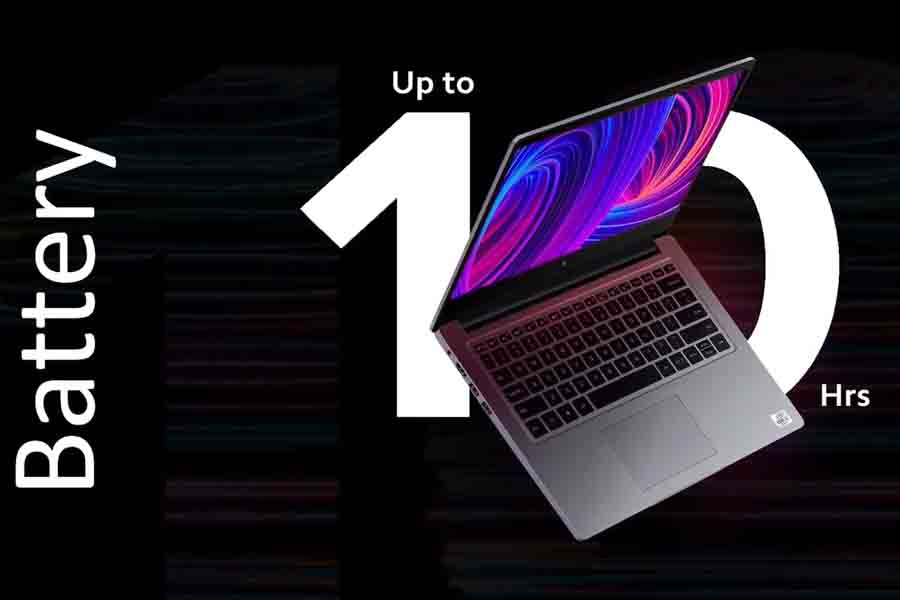
It comes with a 46 Watt-hr battery that Xiaomi claims can provide 10 hours of battery backup. It comes with a 65W charger that can fill the device from 0 to 50% in 35 minutes. The device features two USB 3.1 Type-A ports, a USB 2.0 Type-A port, and a USB Type C port. You also get an HDMI port and a 3.5mm headphone jack that doubles as a mic in as well.

Mi NoteBook 14 Horizon Edition ports

Other than that, the laptop comes with Mi Smart Share that lets users transfer files and folders between different Mi devices. It also has Mi Blaze Unlock pre-installed, using which you can unlock the device in 1.2 seconds using your Mi Band.

Also Read: Mi Band 5 launched in China

Mi Notebook 14 Horizon Edition Specifications:

  • Weight: 1.35kg
  • Dimension: 321.3mm x 206.8mm x 17.15mm
  • Display: 14-inch AntiGlare Horizon Display; 91% screen to body ratio, 178-degree viewing angle
  • Resolution: FHD (1920 x 1080 pixels)
  • CPU: Intel Core i7 – 10510U / Core i5 – 10210U
  • GPU: NVIDIA GeForce MX350
  • RAM: 8GB DDR4 (2666MHz)
  • Storage: 512GB PCIe Gen 3 NVMe SSD / 512GB SATA 3 SSD
  • Keyboard: Scissor switch keyboard; multi-touch trackpad
  • Webcam: No
  • Ports: 2 x USB 3.1, 1 x USB Type-C , 1 x USB 2.0, 1 x 3.5mm jack
  • Connectivity: Wi-Fi 802.11a/c (2 x 2), Bluetooth 5.0
  • Audio: 2 x 2W stereo speakers with DTS Audio Processing
  • Battery: 46 WHr; 65W power adapter
  • Extras: Mi Smart Share, Mi Blaze Unlock, Mi webcam HD (bundled)

Xiaomi Mi Notebook 14 Overview

The Vanilla Mi Notebook 14 is a lot like its high-end, but Xiaomi has cut some corners on this one to keep the price down.

Design and Display

First of all, it comes in a slightly more significant form factor. The dimension on this one is 323 x 228 x 17.95-mm. The reason for this is that the bezels around the screen are thicker at 5.75mm. As a result, it has a screen to body ratio of 81%. Other than that, it features the same 14-inch Anti-glare FHD display with a 178-degree viewing angle. 

Mi NoteBook 14 design

It features the same metallic body as the Horizon Edition too. The chassis is made up of Aluminium-Magnesium Alloy with anodized sandblasted coating on the top. But it is on the heavier side, weighing around 1.5kg.

Performance and Memory

The vanilla Mi Notebook 14 is only available with 10 Gen Intel Core i5-10210U. This comet lake processor has four cores and eight threads. It can reach the clock speed of up to 4.2 GHz. It is paired with Intel UHD Graphics 620. But there is also a variant of the Mi Notebook 14 with NVIDIA GeForce MX250.

Mi Notebook comes with 8GB of DDR4 RAM. Based on the variant you choose to buy, you might end up with either 256GB or 512GB of SSD. However, this storage won’t be as fast as on the Horizon Edition as they are SATA Drive.

Rest of the specs

The rest of the specs looks similar. You get the same keyboard. In terms of ports, you will miss out on a USB Type-C port. It features the same 46WHr battery and boasts 10 hours of battery backup.

Mi NoteBook 14 Horizon edition battery life

Mi Notebook 14 Specifications:

  • Weight: 1.5kg
  • Dimension: 323mm x 228mm x 17.95mm
  • Display: 14-inch AntiGlare Horizon Display; 81.2% screen to body ratio, 178-degree viewing angle
  • Resolution: FHD (1920 x 1080 pixels)
  • CPU: Intel Core i5 – 10210U
  • GPU: Intel UHD Graphics 620 / NVIDIA GeForce MX250
  • RAM: 8GB DDR4 (2666MHz)
  • Storage: 256 / 512GB SATA 3 SSD
  • Keyboard: Scissor switch keyboard; multi-touch trackpad
  • Webcam: No
  • Ports: 2 x USB 3.1 , 1 x USB 2.0, 1 x 3.5mm jack
  • Connectivity: Wi-Fi 802.11a/c (2 x 2), Bluetooth 5.0
  • Audio: 2 x 2W stereo speakers with DTS Audio Processing
  • Battery: 46 WHr; 65W power adapter
  • Extras: Mi Smart Share, Mi Blaze Unlock, Mi webcam HD (bundled)

Xiaomi Mi Notebook 14, Horizon Edition Price in Nepal & Availability

As of now, Xiaomi Mi Notebook 14 Horizon Edition is exclusive to India, where its price is INR. 54,999 for Core i5 and INR. 59,999 for the Core i7 variant. Similarly, the vanilla Mi Notebook 14 has a price ranging from INR. 41,999 to INR .47,000.

We expect the price of the Mi Notebook 14 Horizon Edition in Nepal to be NPR. 90,000 for Core i5 and NPR. 100,000 for the Core i7 variant. Similarly, the price of Mi Notebook 14 in Nepal may start at around NPR. 70,000.

Xiaomi UltraBook Model Expected Price in Nepal
Mi Notebook 14 Horizon (Core i5, 512GB SATA 3 SSD) ~ Rs. 90,000
Mi Notebook 14 Horizon (Core i7, 512GB NVMe SSD) ~ Rs. 100,000
Mi Notebook 14 (Core i5, 512GB SATA 3, NVIDIA MX250) ~ Rs. 78,000
Mi Notebook 14 (Core i5, 512GB SATA 3) ~ Rs. 73,000
Mi Notebook 14 (Core i5, 256GB SATA 3) ~ Rs. 70,000

Check out our unboxing and initial impression of Redmi Note 9 Pro!

Game designer develops custom COVID-19 face mask with LED panel & voice recognition system

The pandemic has affected all of us really badly. It has resulted in a country-wide lockdown, meaning people can’t get out of their houses. Obviously staying home all day is no fun. I mean how many more series or movies can you watch? The boredom is real. As a result, people have started to explore various ideas that will get them through this lockdown. Among the countless experiments that are going on around the globe during this pandemic, one has been creating a lot of buzz on the internet. Tyler Glaiel, a game designer by profession, has created a custom COVID-19 face mask that contains a voice-activated LED panel.

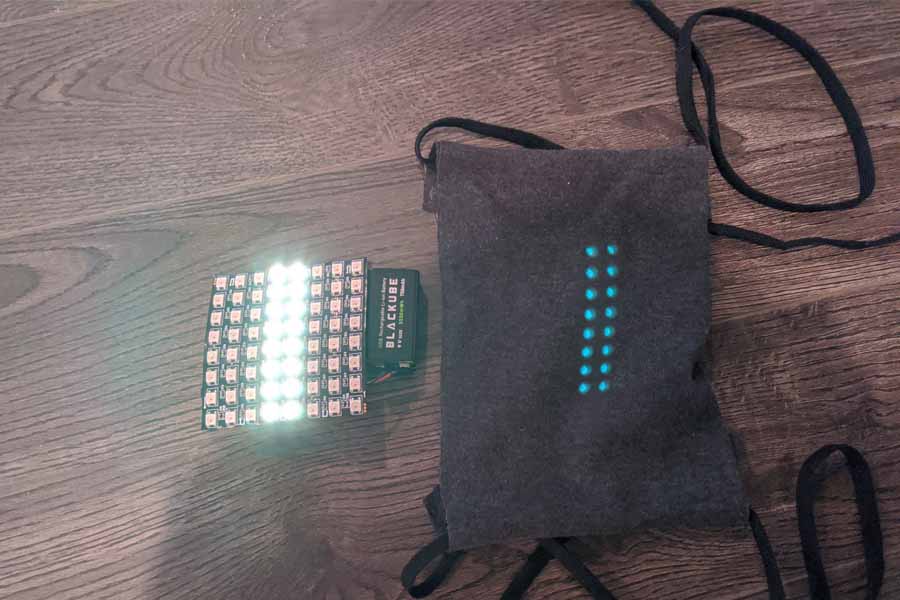
Glaiel’s main motivation behind this custom COVID-19 face mask was that he was finding it frustrating to communicate while wearing a face mask. Thus, he has developed this new face mask of his own with an integrated LED panel. And it is designed in a way such that it simulated the opening and closing of mouth when the person speaks.

His custom face mask includes an array of 16 LED lights. Furthermore, it also contains a voice recognition system. The whole system is built using an Arduino Nano microcomputer and is powered by a nine-volt battery. This LED panel seamlessly fits into a face mask and is removable. Other than simulating the opening and closing of the mouth, the system is also capable of making a smiley shape.

covid-19 facemask custom arduino


Tyler claims that this idea of creating a custom COVID-19 face mask came to him randomly. He looked up for a few similar projects online but couldn’t find any. Thus, he set out on doing this task alone and completed it within a month. All the parts of this face mask are things you can buy right off from a hardware or electronics shop at a cost of around $50. Furthermore, Tyler is not planning on selling these masks. So anyone who wants it will have to make their own. However, he has made the task somewhat easier by creating a step-by-step breakdown of the process in his blog post. Moreover, he has also shared the required codes in his Github account. Thus anyone can have a go at it.

However, there are some drawbacks of this face mask. The LED panel tends to warm up and might not be suitable for children. Furthermore, this mask is not ideal if it has to be worn for a prolonged period of time. Again due to the heating issue.

Tyler Glaiel creating a custom COVID-19 face mask is just one of the examples of how one can make this lockdown more productive. You can try exploring ideas that you might have been putting off for some time now. Or you can use the vast resources that are available online to be more productive. However, having said that everyone can’t make proper use of this lockdown due to their circumstances. But for those who can do it, this is a great opportunity to explore your skills.

MIT’s new “brain-on-a-chip” can process images using refined Memristor design

Engineers at MIT have developed what they call a “brain on a chip” that could change Neuromorphic Engineering forever. A paper published on Nature Technology states that they have been able to fit ten of thousands of memristors into a chip with the area as small as a millimeter-square. It’s a breakthrough that could lead us to powerful AI devices with supercomputers like prowess that can fit into our pockets.

Neuromorphic Engineering

At first, humans created machines to assign them physically demanding tasks. But that was never going to be enough. We now want computers to assist us in jobs that require cognitive thinking. It gave rise to the field of Neuromorphic Engineering (or Neuromorphic Computing). The field deals with machines with computing cores that mimics our nervous system. These systems are based on Artificial neurons that try to replicate the biological neurons that make up our nervous system. These neurons form an Artificial Neural Network and transmit information to each other via artificial synapses.

MIT’s new “Brain on a Chip”

Most of these artificial neural networks are based on software. But the engineers are trying to build a hardware-based neural network. If they are successful, these chips can have instant decision-making abilities without a working internet connection.

Transistors vs. Memristors

Standard chips, like that in our mobile and laptops, have thousands of transistors packed in confined silicon die. Each transistor can store discrete values in the form of 0 and 1. MIT’s Brain on a chip instead utilizes memristors that can save a wide range of values depending upon the strength of the signal that is fed to it. Thus, memristors can carry out more advanced calculations than traditional transistors.

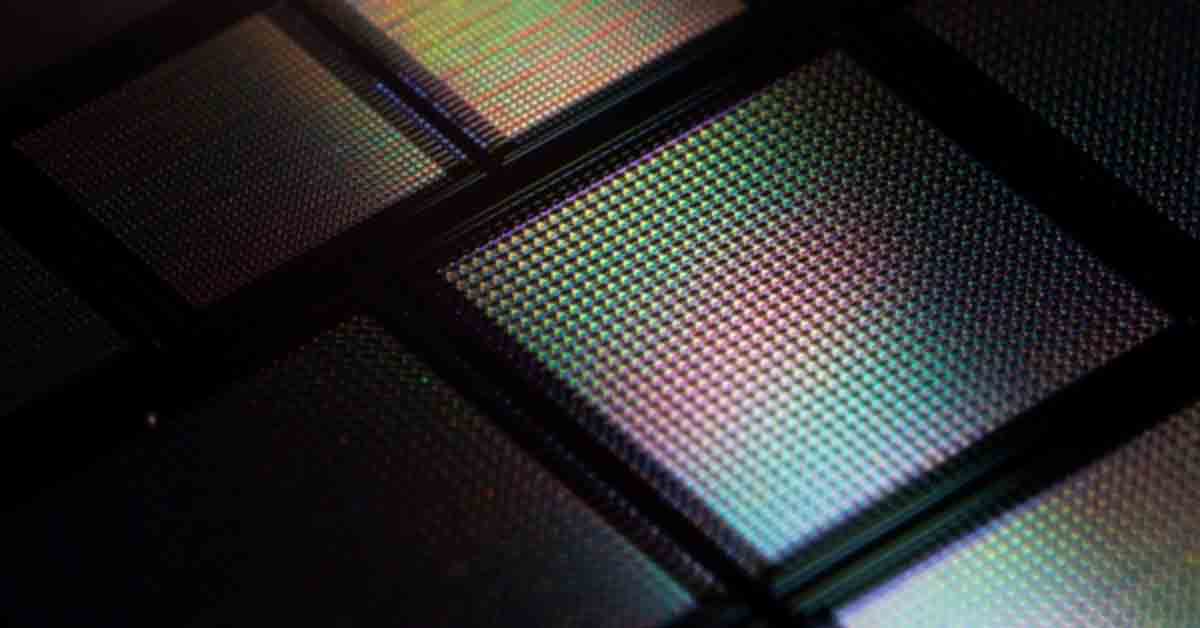
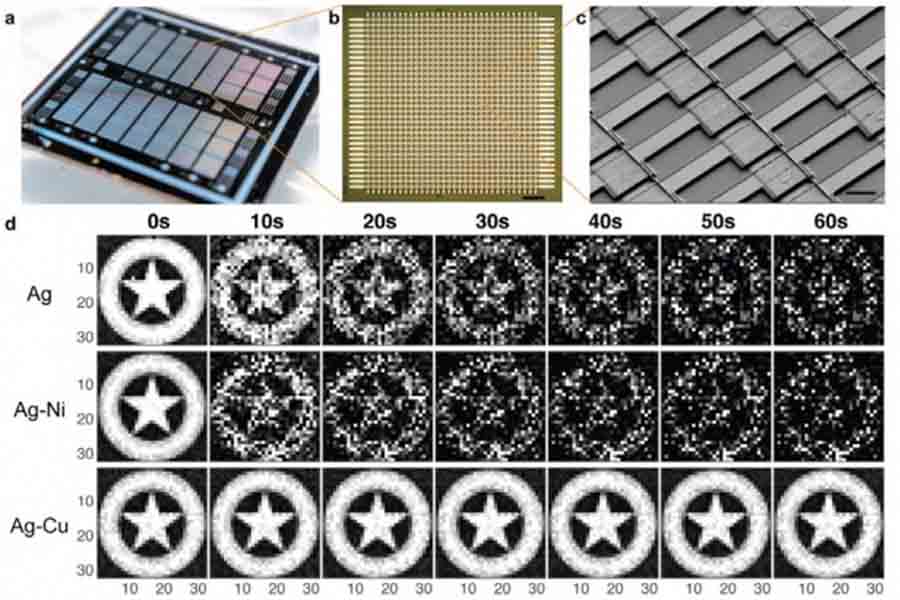
MIT brain on chip reproducing image captain america shield

The problem? The performance of the memristor is compromised when it is implemented on a smaller chip. A typical memristor consists of two electrodes of opposite nature (silver and silicon respectively) with a channel between them. The channel allows the flow of ions from one to the other. On a smaller design, the channel is diminished, thus the flow of ions is affected. It causes the smaller memristor’s results to be less reliable than its bigger counterpart.

Also Read: CATL’s new Million Mile battery for EVs that can last 16 years

New Design

To allow the ions to flow in a smaller conduction channel, MIT engineers added a layer of copper to the negative electrode before covering it with a layer of silver.  It was then sandwiched along with a positive silicon electrode in a silicon die. This way, tens of thousands of memristors could fit in a millimeter square chip without compromising the performance.

Performance

In the initial test conducted, the new chip was able to remember Captain America’s shield and reproduce the exact same image several times. Each memristor was able to record and retain individual pixels of the image resulting in a crisp and clear image. The performance of the three different memristor designs in the image creation test is represented in the image above.

MI brain on chip image processing
Image Processing via new Brain on Chip

The chip is also capable of image processing tasks such as blurring and sharpening. The testers claim that the new Brain on a chip was able to outperform standard memristors based chip in each of the tests.

The future

Though the results are exciting, the researchers still need to refine the product to make it commercial. The next task will be to develop it for complex image recognition tasks. Jeehwan Kim, an associate professor of mechanical engineering at MIT, has stated that the ultimate goal of the research is to develop a chip capable of complex AI operations without the need for supercomputers, the internet, or the cloud.

How to Improve Performance of Your Old Laptop

Unlike a full-blown desktop computer, laptops aren’t that upgradeable. Some of us may be able to afford a new one every now and then. Still, that’s simply not an option for many budget-conscious buyers. But don’t you worry, with some minimal cost, we can upgrade the performance of old laptops to some degree. So, in this article, I’ll be discussing 4 crucial tips to improve the performance of your old laptop. Here, we’re mainly focusing on the hardware aspect of things, with a few software tweaks on the side as well.

Tips to improve performance of an old laptop

#1. Installing an SSD

The first, and the most obvious and effective way to improve the performance of your old laptop is by installing an SSD (Solid State Drive); provided your device doesn’t already have one. Depending upon the type and quality of SSD, you can notice a significant boost in speed – from boot time to launching heavy apps to shutting down the laptop. Sounds great huh? It’s because they are.

You see, while traditional platter-based hard disk drives use mechanical moving parts to read and write data, SSDs are a flash-based memory; meaning the read/write process happens electronically, based on the charge (or lack thereof) of the transistors. Yep, SSDs have no moving parts whatsoever.

Because of this and a slew of other reasons, these are typically faster, more durable, and significantly energy-efficient compared to HDD. Nevertheless, all this advantage does come at a cost. Literally. SSDs have been around for a while. However, these are much more expensive and their max capacity is quite limited as well. But since we’re dealing with low-investment upgrades, the latter is of no concern for us. So, putting the issue of “expense” into consideration, we suggest a dual-drive configuration for the best bang for your buck. More on that later.

Choosing the right SSD for your laptop

Yet, a piece of solvable bad news remains. The thing is, choosing the right SSD requires a bit of research from your end. For instance, what type of SSD slot does your laptop have, which connector do they use, what’s the compatible size, etc. Don’t worry, we’re here to help. Be sure to check your device’s specifications from the manufacturer’s official or another trustworthy website. If your laptop is quite old, say something from 2015 or earlier, it mostly has a 2.5” Serial ATA (SATA) drive, or an mSATA SSD, and not an M.2 slot.
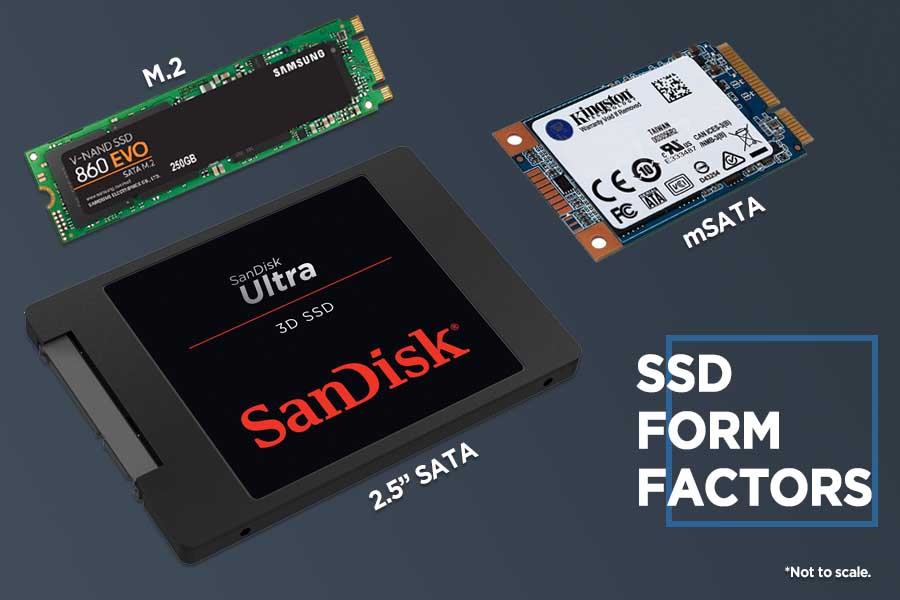
SSD Form Factors - M.2, 2.5-inch, mSATA

Unfortunately, if your device uses an even older PATA/IDE connection, we suggest you skip the SSD upgrade altogether since the effort-&-investment to output ratio is pretty unrewarding. Also, some manufacturers solder the HDD or SDD into the motherboard with no additional slot to spare. If that’s the case, your laptop is beyond the reach of an SSD-upgrade.

2.5″ SATA SSD

Anyway, A SATA port on your motherboard looks like a narrow knife with golden stripes and an uneven intersection.

And that’s where the HDD, SSD, or optical drives connect.

SATA is a computer bus interface that connects the aforementioned mass storage devices to the rest of the PC. There are also different standards of speed grades under it: SATA II/3Gbps and SATA III/6Gbps.

This is an important factor to note as well. Because, if your laptop’s motherboard only supports SATA II standard and you try installing a SATA III SSD, the BIOS may fail to recognize it entirely because of the difference in speed standard. So, the key takeaway here is to connect the correct SATA SSD to its compatible SATA port.

Similarly, the 2.5” SSDs have an enclosed design and come with a varying thickness too. Though the most common standard is 7mm, you can also find 9.5mm and 12.7mm SSDs. However, they’re pretty much extinct nowadays as the 7mm has become the standard thickness or “z-height” for 2.5” SSDs. While 7mm variants can be fit into a bay for 9.5mm drive using something called “spacer”, the reverse is physically impossible. As a result, the size of the SATA SSD to buy is also critical.

mSATA SSD

Besides this, there is also the mSATA form factor. Found in very old laptops, mSATA SSD has a bare circuit board and is usually a low-storage SSD. It is mainly meant to function as a boot drive where the system and other programs are installed. Thankfully, laptops with an mSATA drive are rarely seen these days. That’s because almost every manufacturer has moved on to the newer M.2 connectors.

M.2 SSD

Here, M.2 SSDs have a much smaller form factor compared to their SATA and mSATA counterparts. An M.2 slot can interface with SATA III, PCIe 3.0, and even USB 3.0; meaning any disk drive, GPU, network card, or a low-power USB-compatible device can be mounted on a card using an M.2 slot.

Also, an M.2 SSD may use either SATA or PCIe bus.

Without going into any intricate detail, M.2 PCIe SSD uses PCIe lanes for data transfer and is much faster than SATA SSDs; usually by two-folds or more.
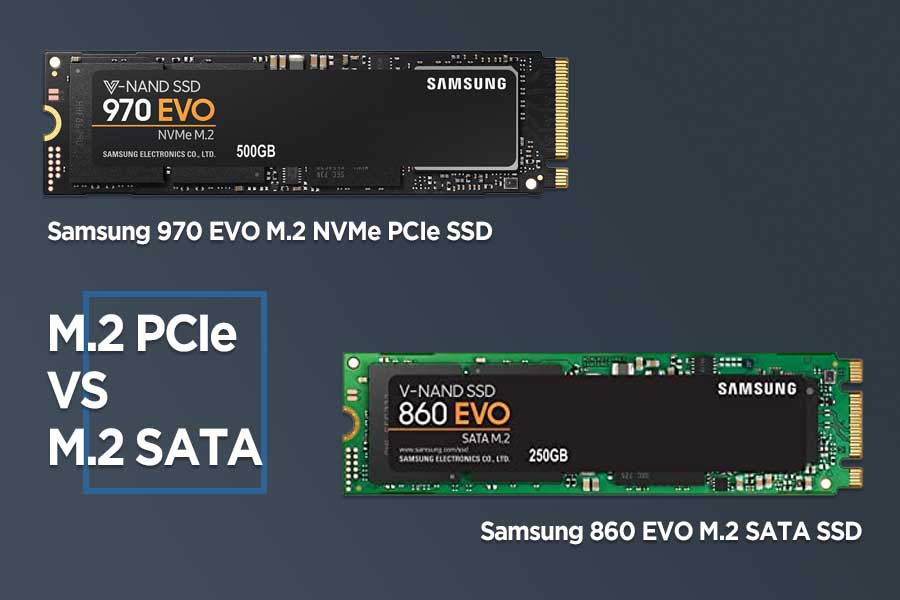
M.2 SSDs - PCIe vs SATA

Though M.2 PCIe SSDs may look like the ideal option of the two, you should go for it only if you frequently deal with transferring a large volume of data. Otherwise, a traditional M.2 SATA SSD will do you just fine. Also, they’re more expensive, so there you go.

Additionally, M.2 SSDs also come in different sizes: Type-2242, Type-2260, and Type-2280 (the most common one). Here, “22” refers to 22mm of width, while “42”, “60”, and “80” refer to the length of the wafer. Like with SATA SSDS, you don’t want to buy an M.2 SSD which is physically larger than the length of the M.2 slot on your laptop.

What about the NVMe protocol?

One more thing to keep in mind is if your SSD uses the “NVMe” interface protocol or not. Short for Non-Volatile Memory Express, NVMe works directly with the PCIe bus to deliver read/write speeds at the actual capacity of the flash memory; void of the restriction found in SATA connection.

That translates to insanely fast throughput compared to even the fastest SATA III standard. But to be able to experience the speed of NVMe, the M.2 slot on your laptop’s motherboard must support PCIe SSDs. Once again, check your device’s specification or use software like Speccy or Crucial System Scanner to find out. So, if supported, always go for an M.2 NVMe PCIe SSD to improve the read/write performance of your old laptop.

Learn more about SSDs here.

Buying an SSD for your laptop

Finally, once you’ve confirmed what type of SSD you’re gonna use, it’s time to buy one. Since we’re not actually dealing with a buying guide here, I’m just going to list out some popular SSD manufacturers for reference. Samsung, Seagate, SK Hynix, ADATA, Western Digital (WD), etc. are some of the trusted ones.

> Installing an M.2 SSD

Here, if your laptop has a vacant M.2 slot, then installing an M.2 SSD is easily done and dusted. But there is one thing to make sure of.

That is, if the M.2 SSD and your laptop’s motherboard are compatible.

Since our goal is to set the SSD as a boot device and your existing HDD to be a secondary device, some M.2 SSD may also require UEFI drivers to be preloaded so that the BIOS recognizes it as a boot device.

> Installing a 2.5″ SATA SSD

If your laptop doesn’t have an M.2 slot, your only other option is to install a 2.5″ SATA SSD. You can either replace the existing HDD with an SSD. But you would still want to have both, right? For this to happen, you’ll need an additional accessory known as “caddy”.

Chances are, most old laptops came with an optical drive for CD, DVD, and Blue-ray discs. And if you’re someone who can sacrifice this drive without any significant repercussion to your workflow, then you can install a 2.5” SSD alongside the existing HDD by buying a caddy.
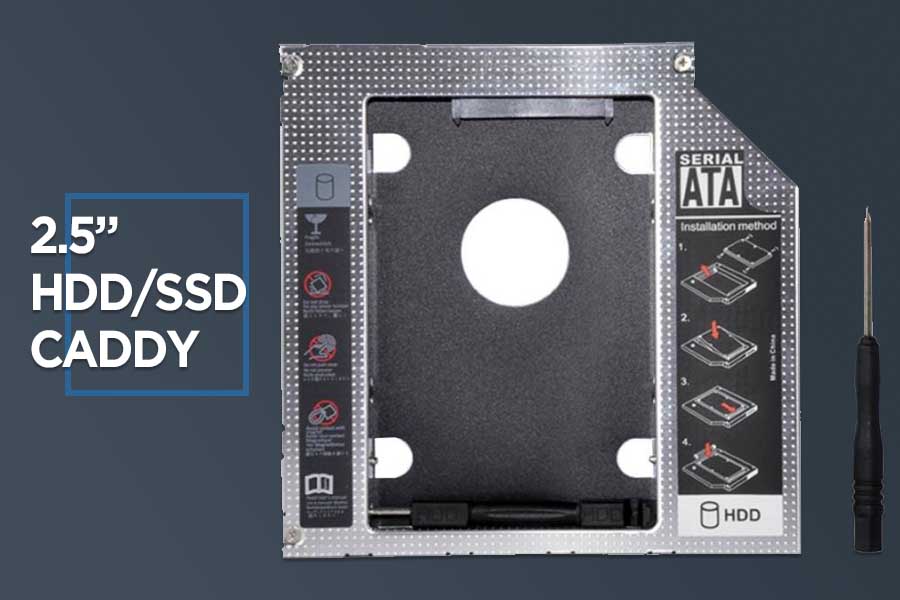
SATA to SATA HDD, SSD Caddy for Laptop

With a form-factor identical to the optical drive, you can install a SATA SSD or an HDD into the caddy, if you will. But (yeah, so many things to consider, I know) there’s not a common standard that OEMs follow towards designing such drives into their laptops. That doesn’t mean every single manufacturer has a different-sized approach. In fact, the opposite. Most of them are similar in size (with a z-height of 7mm), though there are some rare instances of a different thickness too. So, make sure the caddy you’re buying obliges to the size standard of your laptop’s chassis.

Where does the SSD go: 2.5″ bay or caddy?

Now, there’s one more question – where do I install the SSD, into the existing 2.5” bay or the caddy? Usually, both ports have the same SATA standard (II/3Gbps or III/6Gbps). And in such a case, it doesn’t matter where you install the SSD.

Having said that, it’s not unusual for devices to equip different ones. For example: if your laptop’s 2.5” bay has SATA II while the optical drive comes with the faster SATA III connection, installing the SSD into the caddy makes more sense as you’ll be able to able to experience the SSD in its full force.

With this dual-drive configuration, you’ll be able to enjoy faster performance thanks to the SSD, and store your files in the cost-effective HDD. You can also go SSD + SSD but that’ll only ramp up the expenses, which is the exact opposite of our objective.

> Installing OS into the SSD (or cloning it)

Up to this point, I’ve thoroughly discussed how to select the appropriate SSD for your laptop, and how to install them properly to get the performance boost. Admittedly, I’ve skipped steps like unscrewing the base of the laptop, and other physical processes but you get the point.

The next thing we need to do is install the OS into the SSD.

For this, you can either perform a clean installation or clone the existing OS from your HDD into the SSD.

And we highly suggest you go with former since this avoids bringing in all the junk files, viruses, temp files, etc. that may have accumulated in your former disk drive. Also, because we are concentrated on the use of a low-capacity SSD for installing the OS and a couple of other major applications, this is the way to go.

Cloning the Operating System (OS)

Having to install an OS from square one, then its updates and all the other programs and applications you use could be a tedious task. If you don’t want a clean install, there are always options like cloning or migrating the system to the new SSD.

Of course, you can always choose which partitions to clone and which not to. This way, you can copy the boot partitions and not other files like documents, music, etc. You’ll also be needing a software tool like Macrium Reflect Free for cloning Microsoft Windows to an SSD, while manufacturers like Samsung have their own data migration tool called “Samsung Magician”. In our case, we’ll only be cloning the EFI and Windows C: partition (or other partition where you’ve installed Windows OS), while ignoring data and recovery partitions.

This is a pretty sensitive process so make sure you go through a few tutorials on using said software before actually using it. After completing the cloning process:

  • Set the SSD to the number one spot in boot priority under the BIOS settings. This means your laptop will now be booting from the newly installed (or cloned) OS from the SSD.
  • Then, you can delete the Windows and other partitions from the HDD to save the now unused storage.

By the way, all this process can also be done before installing it into the laptop, by using a USB to SATA adapter that costs around Rs. 1,000. This added cost is also one of the reasons why we recommend a fresh installation instead.

Performing Disk Defragmentation on your HDD

And while we’re dealing with HDD here, you should also go ahead and perform disk defragmentation which can greatly improve the read/write performance on the hard drive of your old laptop. In short, it is the process of physically organizing the file sectors on the HDD so that the physical movement can occur much faster.
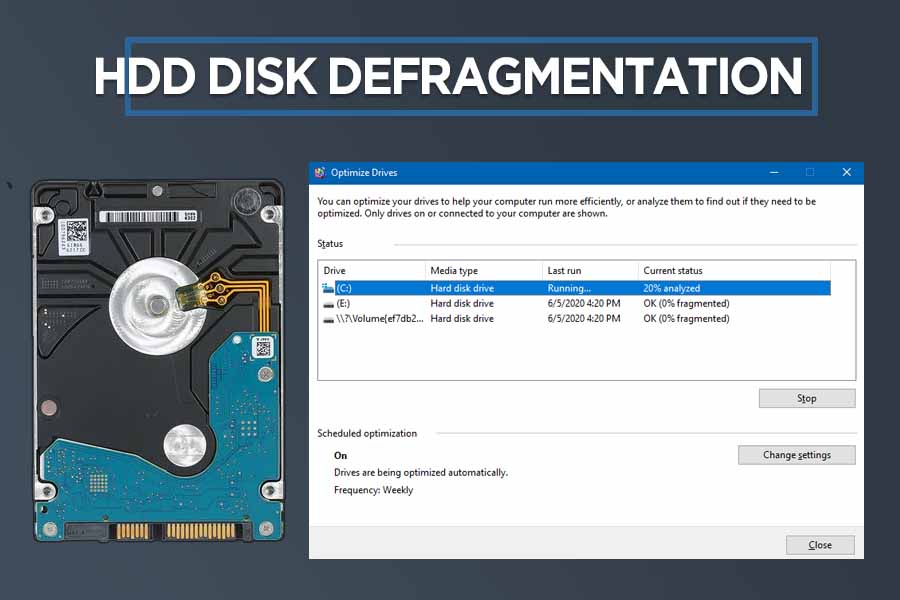
HDD Disk Defragmentation to improve performance of old laptop

You can use Windows’ built-in disk defragmenter or other third-party software like Defraggler, Smart Defrag.

However, and I cannot stress this enough, do not defrag an SSD!

Due to its radical approach in reading and writing data, SSD defragmentation will only result in unnecessary writes to it, thus shortening the lifespan. On top of it, it’s practically inessential in an SSD as well.

#2. Upgrading the RAM

Another way to improve the performance of your old laptop is by upgrading the RAM. Short for Random Access Memory, RAM is typically a non-volatile memory. It is used to temporarily store information regarding threads and processes that are currently running. In simpler terms, it is where your computer loads up all things. Unlike SSD, just adding RAM sticks into your old laptop won’t necessarily improve the performance.

For instance: if your laptop already has a sufficient amount of RAM, adding to it doesn’t make sense.

The thing is, RAM is like a box of chocolates; larger the box, more chocolates you can store in it.

Is this the most terrible analogy or what? Anyway, what I mean is, more RAM means your computer can handle more processes at a time but if you are someone who usually only runs low-weight applications, even 4GB of RAM may suffice; which is considered simply not enough for 2020. Additionally, should the RAM stick in your device come soldered into the motherboard, say goodbye to the chance of upgrading RAM.

So, let’s lay down the logical and practical conditions necessary for increasing RAM capacity in your laptop:

  • Your current setup has a less-than-required RAM capacity.
  • You can physically replace the RAM stick. i.e: the only available RAM stick(s) isn’t soldered into the motherboard. And a bonus point if there’s an extra vacant slot.

Number of RAM Slots & Motherboard Support

While a desktop motherboard may have multiple RAM slots depending upon the model, most laptops max out at two. You can check the available memory slots on your laptop by inside the Task Manager. Under the “Memory” option of the “Performance” tab, it shows info like speed, slots used, form factor, etc.

Also, there’s a limit to the capacity of RAM a motherboard can support. For this, check out the product specification sheet from the manufacturer of your device, or visit other trustworthy websites. Here, you may also find out if the memory is soldered in or not. Kingston has this handy website where you can enter your laptop’s make/model, and it shows you all the necessary info about its memory specifications and more.

Types of RAM on Laptops

Okay, with the eligibility out of the way, let us discuss the two main categories of RAM in laptops – SDRAM and DDR SDRAM. In a broader sense, Synchronous Dynamic RAM (SDRAM) indicates how the RAM behaves; an assumption that the data needed by the CPU will be in a sequence. Yet, it also refers to Single Data Rate SDRAM (SDR SDRAM), which can accept one command and transfer one word of data per clock cycle (either on the rise or fall).
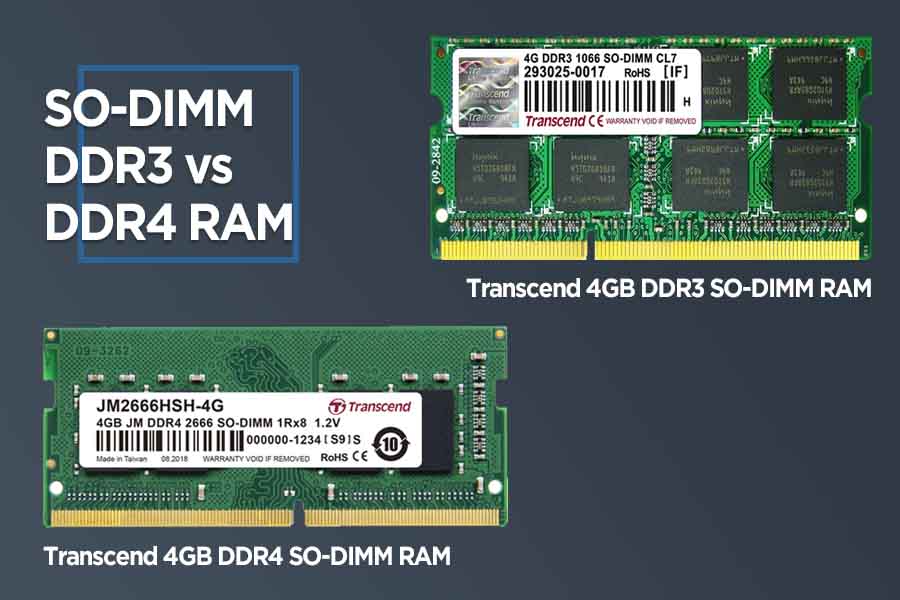
SO-DIMM DDR3 vs DDR4 RAM

On the contrary, Double Data Rate (DDR) SDRAM can fetch data on both the up and down cycles of the clock. Ergo, it has double the data transfer rate without increasing the frequency of the clock.

The first generation of DDR SDRAM was more widely called as DDR1. It was then succeeded by DDR2, DDR3, and the latest standard is DDR4 SDRAM; while DDR5 should be available in either Q3 or Q4 of 2020. DDR3 can be further divided into DDR3, DDR3L, and DDR3U – which have a varying voltage standard. And a motherboard with DDR3 memory slot can take all three standards of its kind.

Without boring you with any details, the thing to understand here is that every new iteration of such RAM standard comes with lesser power consumption, increased transfer rate, and more.

Finding what type of RAM your laptop supports

Now, you might be tempted to install the latest DDR4 RAM stick on your laptop for a performance boost. However, it comes down to the processor-support as well. Even though some modern CPUs can handle both DDR3 & DDR4 memory, older processors typically only favored DDR3 RAM. Furthermore, only some motherboards for Intel Skylake CPU support either DDR3 or DDR4 RAM; that too with a lot of restrictions. In such a case, never mix different types of RAM (e.g. DDR3 and DDR4) in the memory slots. Either use DDR3 sticks only or DDR4 only – but never simultaneously.

Operating System and RAM limitations

That was about the generation of SDRAM. On the other hand, maximum RAM capacity support is also OS-dependent on top of the motherboard support. A 32-bit Windows OS can only support a maximum of 4GB of RAM. Similarly, the 64-bit Windows 7 Home Basic is limited to 8GB. This is not an issue for newer OS releases like Windows 8 or 10. They can boast hundreds of gigabytes and even a couple of terabytes of RAM. You can find out about all the memory limits in different Windows OS on this link.

To know what type of processor architecture your laptop has, just right-click the “My Computer” or “This PC” option and click on “Properties”. Under the system header, you can check out “System Type” which may read as either “64-bit Operating System, x64-based processor” or 32-bit, x86. So, keep in mind what OS you’ll be installing, before upgrading the RAM.

RAM Form Factors (aka, the size)

What’s left? Yeah, the form factor. Like how SSDs come in different shapes and sizes, RAM also comes in varying sizes. However, it’s a lot less complicated here since the differentiation is quite straightforward.

You have the full-size DIMM RAM (Dual In-Line Memory Module) for desktop computers and the SO-DIMM (Small Outline DIMM) RAM for compact devices like laptops. As the name implies, DIMM RAM is larger usually measuring 4.5–5 inches with up to 240 pins, while the latter has a typical length of 2.5–3 inches with up to 200 pins.

Implementing Dual-Channel Memory

There’s also another buzzword associated with upgrading RAM, and that is “dual-channel memory”. To understand this, we first have to know what a single-channel memory is. Under this, a single RAM stick is deployed that uses one 64-bit data channel. In contrast, dual-channel memory uses two 64-bit data channels with two RAM sticks, thus doubling the bandwidth to a 128-bit channel.
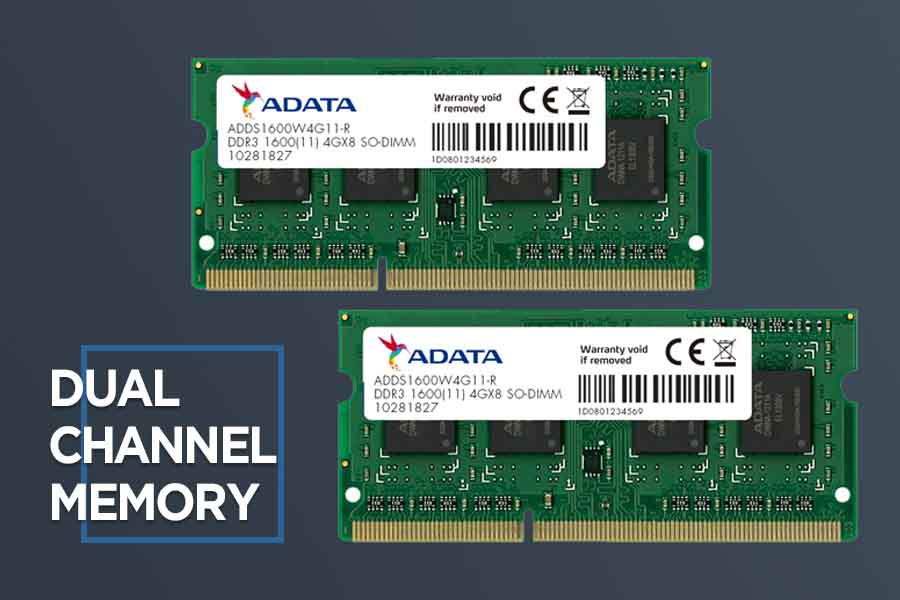
Dual Channel Memory to improve performance of old laptop

But achieving dual-channel memory isn’t as simple as installing two RAM units into the laptop. Though that can theoretically work, different manufacturers’ RAM sticks vary wildly in terms of memory timings. Using different parameters like CAS latency (CL), tRCD, tRP, and tRAS, it determines the performance level of the RAM. These things are way too technical and mathematical as well, so forgive me for skipping it.

So, dual-channel memory is absolutely guaranteed only when using a combo memory kit (2x 4GB, 2x 8GB, etc.)

Notice how the serial number (ADDS1600W4G11-R) and memory timings (10-28-18-27) are exactly the same in the two RAM kits shown in the image above. What you can infer from this is also the fact that the existing RAM in your laptop will most likely be incompatible with the dual-channel mode. Therefore, always opt for dual-channel memory to improve RAM performance on your old laptop.

Buying RAM stick(s) for your laptop

With all this info taken into consideration, you are finally ready to go buy yourself a RAM kit. Some reputed manufacturers include Corsair, G.Skill, Kingston, ADATA, Transcend, etc. The installation is quite simple.

> Installing the RAM

First, power off the laptop and remove the battery (if possible). Then, press the power button for about 20 seconds to get rid of the residual electrical charge in the capacitors, left inside the laptop. Also, ground yourself by touching any metal surface, or wearing a dedicated anti-static wrist strap to cancel-out any static charge in your body. And this goes for every time you are meddling with the internals of the device.

Here, if you need to remove an existing RAM stick, just push the edges of the clip holding it and it will pop-out. Try to avoid touching the bottom connectors as much as possible. And to put the new ones into the place, first, make sure you align the notch in the RAM module to the groove in the actual slot.

Now, place it in a roughly 45º angle and then use firm & even pressure on the top corners to push it into the slot. Remember, don’t force anything or you may end up damaging the RAM or the SO-DIMM slot. Once inserted, tilt the RAM until the metal arms snap into place, with a sharp “click” sound. Make sure the RAM stays flat, with the clips holding them securely.

#3. Improving the thermal performance

Maintaining a laptop’s temperature is a critical aspect of retaining a balanced performance. But with CPU & GPU getting denser than ever with tightly packed transistors and a high TDP, the boost in performance comes at a collective cost of excessive heat. Because the electric signal passing through the transistors in a processor dissipates heat, it is important that the heat remains in check. And if the computer fails to do so, the imminent overheating can result in issues like discomfort in usage, to even system failure. Hence, tending to improve thermal performance is crucial for an old laptop.

Efficient Cooling & Ventilation System

Laptops with a good cooling and ventilation system are usually impervious to such mishaps. However, not every one of them is manufactured the same way. Companies find ways to cut corners in areas like this to bring the laptop’s price down – and it’s a gateway to thermal throttling. It refers to the safety mechanism of a processor, where performance is sacrificed in order to match the inefficient cooling solution available in the device. You can prevent such problem by using the following techniques:

  • Use a laptop/notebook cooler. It’s an external accessory with fans, that rests under the laptop to supply cool air to the air vent which is usually located at the bottom of the laptop.
  • Set the battery performance level to the max; this will ensure that the fan is always running.
  • Unplug the laptop when not required since the continuous supply of power can generate more heat
  • Be aware of how you place the laptop, either on a flat surface or your lap. Ensure that the vent & the surface have enough space to cycle out the hot air, without getting trapped underneath.
  • If possible, crank up the fan/s’ RPM (Revolutions Per Minute) setting for max performance. But remember, this will yield loud fan noise.

Laptop Cooling Pad

Though laptops with vapor cooling chambers are able to dissipate heat much more efficiently, it’s highly unlikely that older and inexpensive devices have it. Rather, such laptops come with a traditional heat pipe for flowing the hot air. In such cases, the aforementioned mentioned methods will definitely help towards efficient cooling. And even if your laptop has a solid thermal system, we recommend you follow those steps for maintaining the thermal performance anyway.

Clean out the dust!

Another reason why laptops overheat is because of the dust accumulation. With time, dust and dirt particles settle inside the device, which then goes on to block the airflow to and from the laptop. No matter how promising the “anti-dust” system your laptop may have, it is impossible to prevent dust from entering & eventually withering the ventilation.

Therefore, one must clean out the dust inside the laptop every once in a while, by using a mini vacuum and other tools. If you don’t feel confident enough to be performing such an intricate task, you can always give your laptop for servicing in a repair center which will set you back a couple of hundred rupees every time. One additional effective method to improve the thermal performance of your laptop is to re-apply the thermal paste.

Reapplying Thermal Paste

Here, a thermal paste (aka thermal grease/gel/compound, heat paste, etc.) is a semi-fluid thermally conductive substance. It is applied on top of the processor (CPU, GPU) or other heat-generating components, to eliminate any air-gap between the chip and the heatsink. With this, the heat sink is able to effectively transfer heat from the processor to the cooling system.

Every laptop comes with thermal paste pre-installed though its quality will differ between models. However, these dry-up after a while, thus crippling your laptop’s heat dissipation. As a result, you may need to re-apply it to improve the thermal performance of your old laptop.

Having said that, this is not a frequently required process like cleaning up. Provided that your device shipped with a decent thermal paste, you won’t need to replace it for a couple of years or even more. Nevertheless, if you encounter issues like overheating, thermal throttling, etc. it could be an indication of the necessity to do so.
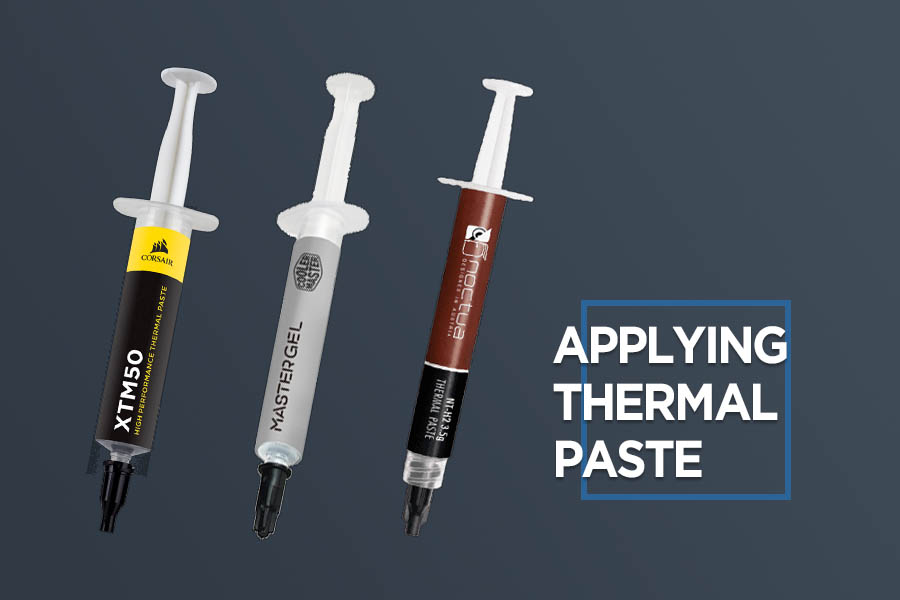
Applying Thermal Paste to improve performance of old laptop

Some popular manufacturers of thermal pastes include Thermal Grizzly, Cooler Master, Arctic, Noctua, etc. Besides the appropriate volume of the thermal paste itself, there are other factors to consider as well. For example, its composition greatly determines the success/failure of this little venture. So, unless you absolutely understand what you’re doing, this job is best suited for a professional.

#4. Installing a Linux distro

As a final Hail Mary to improve the performance of your old laptop, you can try installing a Linux distro. I know it’s a little daring one since you have to get used to a whole new Operating System (OS). I bet many of us have been using Windows from the very beginning. And it’s easy to understand how suddenly migrating to a different environment can be challenging. Add this to the fact that many popular programs like Microsoft Office, Adobe Photoshop aren’t natively available on the platform, though there is some workaround for them.

For instance, you can use the web version of Microsoft Office and install Photoshop using “Wine”, which helps run Windows applications on Linux and other operating systems. Or, just familiarize yourself with substitute products as there are plenty of them. Mind you, installing applications on Linux may be more than just clicking “Next” as we do on Windows.

Moreover, Linux is also open-source and absolutely free. You can choose to donate to the development team, but that’s not mandatory. And while Windows’ system requirement gets heavier with every iteration & update, Linux supports every generation of devices pretty well. The reason Linux so famous is also because of how efficiently it handles system resources, resulting in faster performance.

Specialized Linux Distro For Your Need

In addition, you can also find a Linux distro for your specific usage. For instance, if you’re a student, go with “UberStudent”. Or, if you’re into security, hacking and such, install “Kali Linux”, “BackBox”, etc. For regular usage, most common Linux distros include “Ubuntu”, “Linux Mint”, “Elementary OS”, etc. And in our case, there are several Linux distros targeted to improve the performance of old and underpowered laptops as well. Some of them include:

These distros are specifically designed with old hardware in mind and deliver great performance. Though it doesn’t magically improve the performance of your old laptop similar to the latest models, you can have a smoother workflow; compared to when the device ran Windows.

Installing a Linux Distro to improve performance of old laptop

Finally, you should dual-boot Windows and Linux side by side so that you can easily switch between them when necessary. Dual-boot simply refers to installing two OS in a computer at the same time; and you can choose which OS to load upon boot. There are quite a few complications and risks to dual-booting Windows and Linux OS. So make sure you go through multiple tutorials on how to do it.

Improve performance of old laptop – A summary

S. No. Technique Why?
1 Installing an SSD Faster read/write speeds
2 Upgrading the RAM Better multitasking of heavy apps
3 Improving the thermal performance Preventing overheating, thermal throttling
4 Installing a Linux distro A less resource-hungry substitute to Windows OS

CATL announces Million Mile Battery for EVs that can last 16 years!

The transition from traditional fuel-powered transportation to Electronic Vehicles is key to a safer and pollution-free environment. However, some factors turn people away from EVs. One such factor is the EV’s battery. The batteries in the electric vehicles don’t last forever and are pricey to replace. Batteries have improved over the years but are still not good enough for people to make the change. But that could change with the Million Mile Battery. CATL, an industry-leading battery manufacturer has announced that it is ready to mass-produce car batteries that can last up to 16 years and one million miles. The company’s link with Elon Musk’s Tesla hints that the latter could be the first manufacturer to use it in its EVs.

Efforts for more efficient Li-on batteries

A report from Reuters earlier this year reported that Tesla was working on a million-mile battery in collaboration with CATL. It isn’t hidden that Elon Musk and Tesla are pushing for a more efficient battery for their electric vehicles. The focus has been on reducing the cobalt composition and on increasing the recyclability of the components within the cells. Tesla recently bought Maxwell Technologies and is reported to have close ties with Redwood Materials. While the former aims to bring down the cost of manufacturing li-ion battery, the latter is a startup focused on recycling old batteries.

Tesla isn’t the only car manufacturer to be working on cheaper and cleaner battery technology. Back in May, General Motors announced that its latest batteries require 70% less cobalt, a feat that could be the result of its collaboration with LG Chem.

CATL Million Miles Battery: Everything you need to know

The latest break-through in the battery industry has come from Contemporary Amperex Technology, otherwise known as CATL. The company has claimed that it’s capable of producing batteries that can last for sixteen years or one million miles (1.26 million miles to be exact). It doesn’t mean that on a single charge, vehicles will be able to cover such distance. What it means is that the car will have to have covered 1.26 million miles before the battery needs a replacement. It still is a major leap for the EV industry that is struggling with the longevity of batteries.

CATL R&D chain pack for Electronic Vehicles EV

The Million Miles Battery will be 10% more expensive than the standard batteries of today. However, in the long run, it could prove pivotal to lure people towards alternative energy. With the Million Mile Battery, electric cars will have a longer life span. It will reduce the cost per unit energy of the EV. It has been widely accepted that if the EV start offering $100/kWh, it will lead to price parity with its fuel-powered counterpart. As such, there will hardly be any reason for customers to go with traditional fuels. We will have to see if the Million Mile Battery will be able to reach this feat, but there is no denying that it is a positive step towards the ultimate goal.

The company is well-aware of the fact that the industry has taken a hit from the recent coronavirus outbreak, and it will take some time for the industry to recover from it. CATL believes that EV will be the first to recover compared to its gas-powered counterpart. It is confident that the EV market will start showing growth from 2021.

CATL also expects EVs to be mainstream starting from 2030 – 2035.

Relation with Tesla

Company’s Chairmen, Zeng Yuqu, has said that the company can produce the Million Mile Battery if anyone places an order. He has accepted that he is close to Elon Musk and that the two share insights on research and business. The two have also worked together earlier this year for the ventilators that Elon Musk promised during coronavirus outbreak.

Tesla Model 3
Tesla Model 3

Tesla appointed CATL as the battery supplier for Model 3 for its Shanghai-based plant for a two-year term. Though he is tight-lipped about Tesla’s contribution to the Million Miles Battery, Yuqu has accepted that the two companies are working on cobalt-free batteries. CATL could start supplying the improved batteries to Tesla starting from next year.

Also Read: SpaceX to start public beta-testing of Starlink

Preliminary Doubts

CATL hasn’t even started manufacturing the Million Mile Battery, but people doubt if it will bring a positive impact on the industry. Though the battery may not require a replacement before 16 years of its service, rarely do people stick with the same car for that long. It could lead to a waste of the true capability of the innovation. Considering the added cost associated with its manufacturing process; the situation could prove to be quite worrying instead.

It is a significant change that people who doubt the longevity and replacement cost are now worried that the full capability of the batteries won’t be utilized properly. However, some experts suggest that the unused battery could be reused in other new EVs.

CATL Million Mile Battery: Production and Availability

Reuters earlier reported that the Million Mile Battery could debut with the Tesla Model 3 in China. However, there has been no confirmation from either side for that matter. Tesla isn’t the only company with links to CATL. We could see CATL supplying the new innovation to companies like BMW, Toyota, and Volkswagen. CATL is planning to open a plant in Germany and, in the process, has been close to German automobile manufacturers.

CATL is confident that the Million Miles Battery will be in cars starting later this year or the start of the next year, with the latter being the more realistic time frame.

Check out our review of NIU NGT!

Visionox ready to mass-produce its Under-Display Camera technology

Back in the day, we used to have smartphones with thick bezels around the screen. By today’s standard, they looked ugly. Manufacturers came up with different methods to fix that. Today almost all smartphones have either a punch-hole or a notch for better screen ratio. Some even go further with a waterfall display and motorized selfie camera. Soon we might see smartphones with under-display cameras. Visionox, a leading display manufacturer, has announced that its under-screen camera display is now ready for mass production.

Visionox Under-Display Camera Technology

Once smartphone brands figured out a way to move the fingerprint sensor under the screen, they wanted to do the same with the front camera for the sake of an all-screen display.

Transparency Factor

However, it isn’t as easy as it may sound. That is why we are yet to see the tech incorporated in a commercial smartphone. Oppo was the first brand to showcase a working prototype of the under-screen camera phone, back at MWC 2019. With a transparent screen, brands have to take into account the phenomenon of light diffraction that can affect both the picture quality and viewing experience.

To overcome all the issues, Visionox has said that it has experimented with different types of screen layers. The new screen is a combination of both inorganic and organics layers. It is still unclear how the combination of the two works but the company has stated that the organic layer forms a transparent layer, whereas the inorganic layer forms a membrane layer.

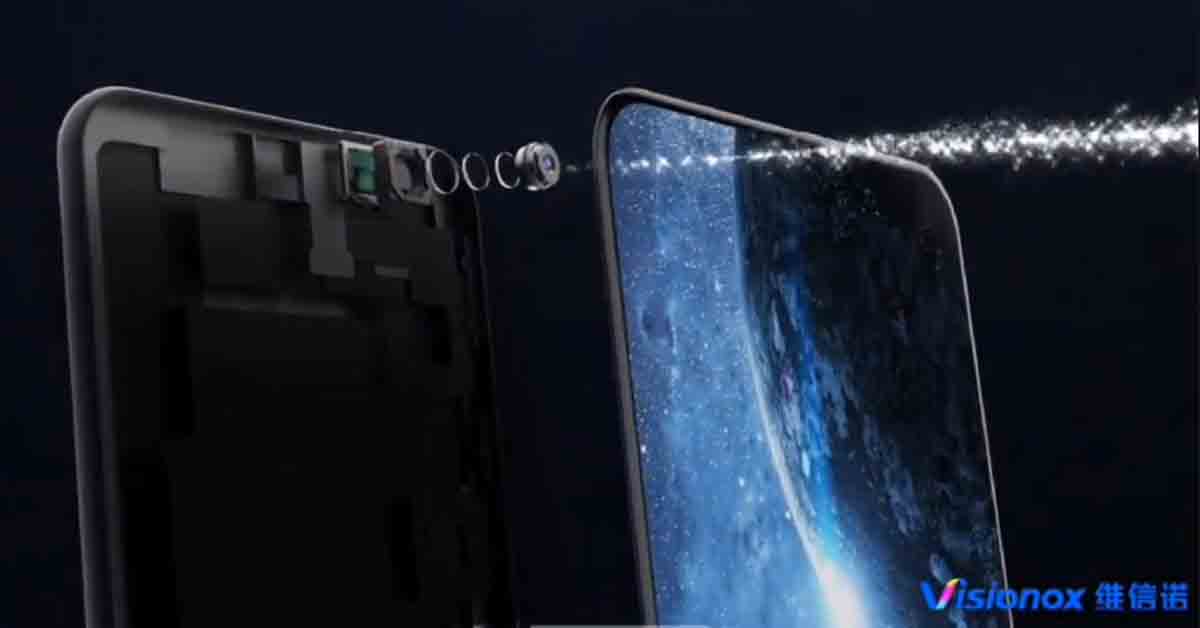
Smartphone prototype with VIsionox Under display camera technology

Camera Performance

The new under-display camera also raises questions about the camera performance. Images from Oppo’s under-display camera suffered from blurs. The shots also showed a yellowish tinge. To avoid the same fate, Visionox has come up with a different solution.

The surface of the screen just above the camera has been modified in the pixel level to allow the camera to shoot pictures from below the screen. Visionox is calling the screen in this area as “Secondary Screen”. The company has utilized industry-first drive circuit technology to get rid of any interferences that can affect the performance of the camera.

On top of that, Visionox has adopted algorithms to fix issues relating to brightness, viewing angle, and glares that arise with a transparent screen. However, we could still notice the difference between the quality of the primary and the secondary screen.

Visionox Under-Display Camera: When will it debut?

Visionox is claiming that its under-display camera technology is ready for mass production. We will have to wait to see if manufacturers want to include it in their upcoming launch.

NEA brings Self Meter Reading, Online Payment System to its Mobile App

A couple of weeks ago, we reported about how Nepal Electricity Authority (NEA) had introduced an online meter reading system on its web platform. Because of the ongoing lockdown, NEA officials haven’t been able to examine the electricity meters in our homes. Therefore, NEA has been approximating our electricity usage based on past consumption. It’s a clever ad hoc solution to the problem. Yet, this cannot go on the long run. And now, NEA has embedded the “Self Meter Reading” into its official app. Let’s find out more.

NEA App: Self Meter Reading

Since NEA is assuming your current month’s usage, depending on earlier records, the process is riddled with inaccuracy. As a result, this most certainly has resulted in financial losses – to both consumers and NEA. Not on a one-to-one basis for every subscriber, but you get the point. And the self meter reading feature in question looks to solve exactly that problem. Under this, a user has to first signup to the system.

But as we complained in the original article about the online meter reading system, the registration mechanism is very insecure as it lacks any kind of verification. Anyone can signup using anyone’s phone number and it doesn’t matter. There isn’t a metric for a secure password like using alphanumeric values, though the character length must be at least 7.

After completing registration, you are now ready to use the “Self Meter Reading” feature inside the app. First, you need to register the consumer information, specific to your electricity meter. You can also add multiple consumers if you’d like.

Now, from the screen, click the “Add Meter Reading” button of the registered customer data. Look up the reading on the electricity meter and first enter it manually in the text box allocated. And right below it, you get the option to upload a photo of the meter to the system. Finally, the system will then calculate the pending amount.

I’m pretty sure you can already identify the loophole(s) of this system. Because it doesn’t use any sort of machine learning or AI technologies, there’s no way to verify if the manually entered value and what the uploaded image shows are one and the same. NEA is entirely relying on people’s loyalty here, with a legal punishment in place under the “Distributions Regulations” for someone actively defacing the system’s weaknesses.

Online Bill Payment

The app has also added more payment partners under its online payment system. Earlier, you only got two payment options within the app – eSewa and Nepal Investment Bank Limited (NIBL). The added options include:

  • City Express Pvt. Ltd.
  • Himalayan Bank Ltd.
  • Pay Point Nepal
  • Prabhu Bank Ltd.
  • Mahalaxmi Bikash Bank Ltd.

However, none of them work as they should. Selecting their link only redirects to the homepage of their website, unlike a dedicated “Online NEA Bill Payment” portal in the case of NIBL. That was about the electricity bill payment through banks. More disappointingly, it doesn’t integrate the user info with the digital wallets embedded into the system either. Clicking on the “eSewa” option just redirects you to the app (provided that it’s installed). And right now, it does nothing when selecting the “Pay Point” option.

Also Read: Best Digital Wallets in Nepal (Updated)

To conclude, as of now, only the NIBL option works somehow. You are also eligible for a discount when making payment through the online system. If anyone from the app development team or an authorized NEA official is reading this, please release a feature only after conducting appropriate tests to ensure the feature works seamlessly.

Other Features

Other features added to the June 7 update includes adding details regarding “No Light Number“, a separate “Recruitment” and “DCS (Distribution Centers) Contacts” section, etc. Here, you can call the no light number of your DC to get info regarding issues like a power outage. The app’s dedicated recruitment section can be used to learn about new vacancies in various positions throughout the country for NEA.

There are also certain visual changes made to the app. All the feature-boxes were colorful, while they’re all of a plain white background now. The “Settings” cog on the top-right corner of the home screen is gone, while the hamburger menu on the left side includes options to access official NEA info like “Annual Report”, “BOD (Board Of Directors)”, etc. Unfortunately, the app is only available for Android users, while NEA couches that they’ll launch the iOS version of the app pretty soon as well.

Alongside the update, NEA has also introduced a toll-free hotline number1150” for complaints or making service requests like meter reading. This service is operable 24 hours a day.

Download NEA App: Android